as reference i recommend w3schools
what even offers a free space if you want to 'show off' to friends or teacher (FREE: 500 limited clicks / page impressions per month / 25MB data transfer / 20MB storage).
i used it to test a 'Layout Flexbox' what i later used inside ESP and PICO W webservers
but as a basic start best is to make a
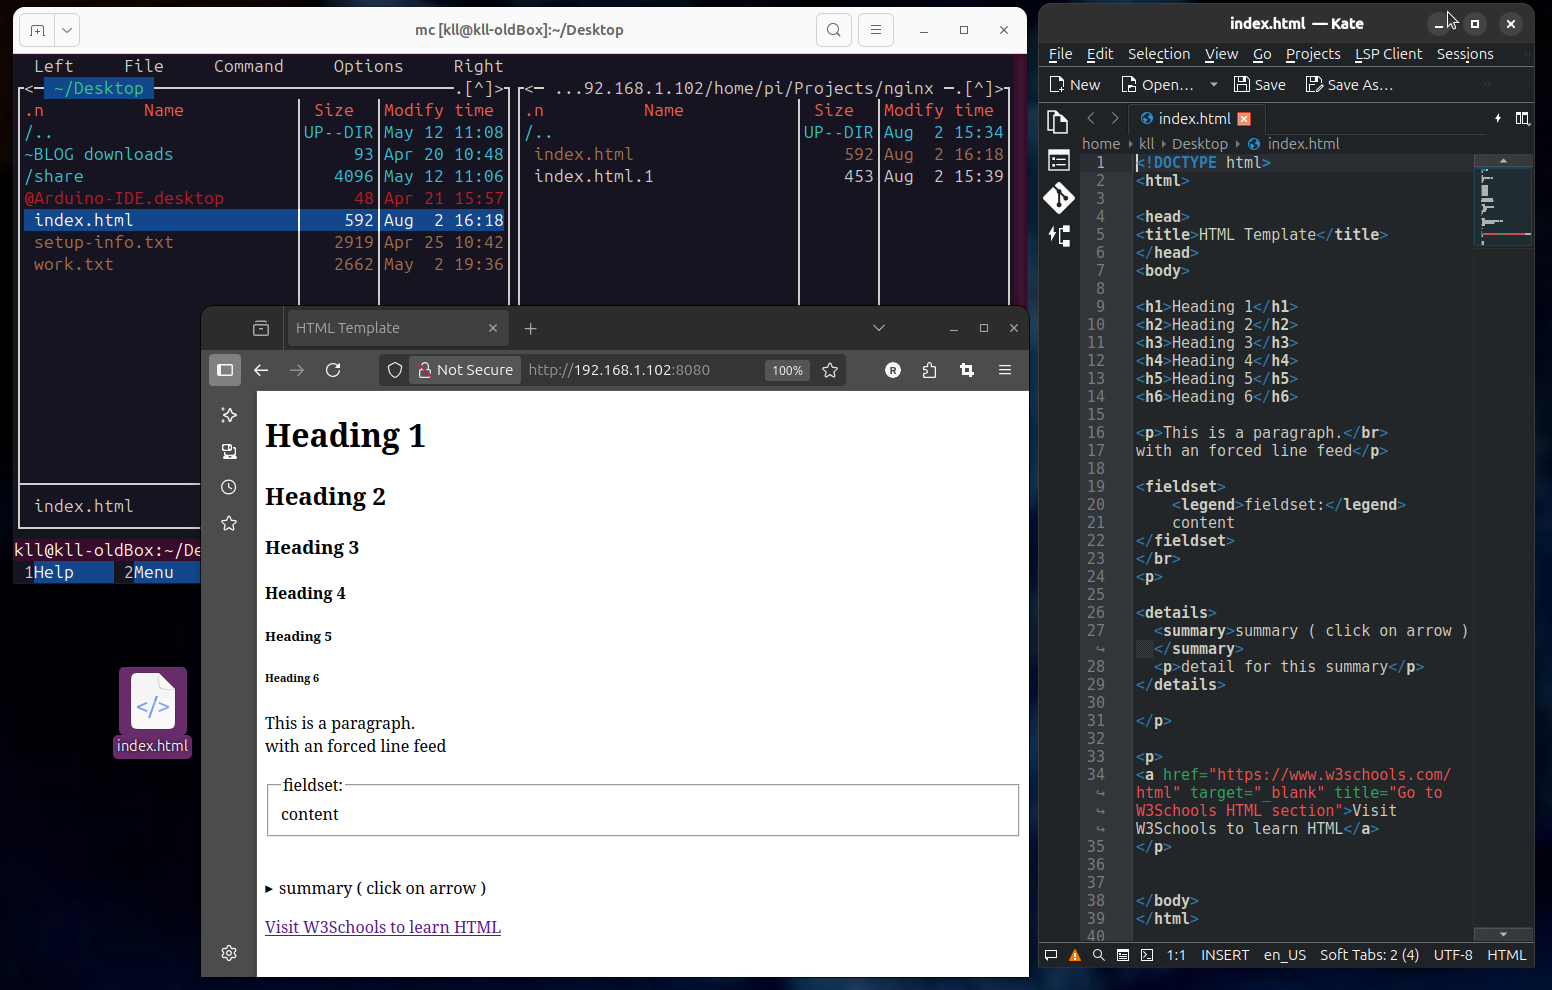
HTML TEMPLATE ( index.html file on desktop can open by double click with browser / no server needed )
one HTML file where you test interesting HTML code lines
and that file can be your 'cheat sheet' source to copy from forever index.html
more see at the GIT for this project,
the HTML template example
now might want to learn about 'style' like change colors...
by using the 3 ways:
CSS can be added to HTML documents in 3 ways:
Inline - by using the style attribute inside HTML elements
Internal - by using a style element in the head section
External - by using a link element to link to an external CSS file
for a full page layout might look into something like FLEX BOX...
and test it by changing the browser window size ( and also view it from a phone browser )
HTML pages might need 'enhancement / functionality' using JS Java Script
what is much more like a programming language ( HTML is not considered programming )
/ but is it a scripting language ( and never compiled ) interpreted
inside your browser ( sometime also inside your server )
by a build in interpreter, most used: V8
but usually you not start from scratch...
more like you load a 'ready tool' at the header of an HTML file ( what might be loaded from internet or your sever )
and later just use it ( like for some user interaction )
see jQuery or Bootstrap
but a very basic thing would be:
at the GIT for this is a example of JS starting with inline script
- using a function ( with 2 parameters ) to display text
- using a array of texts and display it in a FOR loop. at GIT
if you want reuse your script better put it in a extra file ( script.js ) on your server,
but also depends, if you are comfortable with editing 2 files
or more like one 'long (HTML & JS) code'..
about JS, there is a niche JS app ?for artists? what is rarely used in web dev, but very powerful
PROCESSING has a JAVA a JS ( now also a PYTHON ) version
for make graphics even interactive / pls find its script online editor
there is a interactive online video: p5js intro
while i often play ( on RPI ) with NODE JS or BUN
and testing various examples ( and frameworks like REACT, HONO ... ) , i actually have not found a free web space where i could use THAT to go online with it?
possibly must rent a 'dedicated server' like from hetzner.com
a great ( and NOT USA controlled ) online service.
but actually THIS BLOG HERE runs on hoster dreamhost.com
i got sponsored space AND even domain name payments from a friend
that is NOT FREE & credit card ( possibly passport ) required
normally you use Node / Bun ( and a optional framework ) for development
and when ready you BUILD it into a static site,
what you can copy under a apache / nginx server for production use.
so while learning HTML is more a high-school thing, then what makes a web developer?
(a) server setup? like learn how to make a web-server ( old style LAMP Linux, Apache, MySQL, and PHP )
(b) site setup? code HTML / add JS frameworks /
OR install a CMS Content Management System, tweak it on 'theme' ..look
and train customer to use/fill it
typically something like WordPress
(c) site secure it and increase its SEO (Search Engine Optimization)
and with that it might come with the need to use a background database
( what contains tables with data ... up to the whole page content.. )
yes, need to learn to setup databases with tables,
and to write the code to use that data
C R U D Create / Read / Update / Delete
the used language would be SQL Structured Query Language
(1) now professionally you would go for a
* payed web-space and
* buy a domain name
( what requires provide passport copy and pay yearly via credit card for both )
(2) but as a beginner ( esp. student ?minor ) i would only look for FREE stuff / workarounds
i use byet.host ( free and ADD free ) for 15 years OLD BLOG
where i installed php-fusion CMS ( now obsolete )
today i would first checkout on infinityfree.com
ok, i did and see
- WARNING! actually they say the FREE account now NOT includes most tools ?
so i start with just making a index.html only: infinityfree.me
- funny, it seems to be the same hoster as my old OLD BLOG
and run into problems just by upload one more picture..
usually this is for saving and publishing code repositories ( esp. if you support open source )
but it also allows a kind of home page ( per user (or repository)) github-pages
long time ago i made one for a processing tutorial ( using a HTML5up template )
and also a full interactive 3D view / electric design tool /
where all the (electric ) math in the HTML text section is dynamic depending on your input / selection online calc and 3D view
where here i work local on
* a linux 'UBUNTU 25.04' desktop PC ( KATE editor ) and
* transfer the tested HTML file to a
** (headless aka power & ethernet only) RPI2 ( from 2015) with
** docker NGINX web server
** ( using 'MC' login network where usually webserver are accessed via FTP )
* and then back on desktop call that page from there via browser:
read first a good start about RPI
now here more about my setup of that RPI
*1 use RPI imager to burn a uSD card ( or USB stick if boot enabled already ) allow SSH login for remote access ( headless )
for to explore RPI world best use Raspberry Pi OS today
* 64bit version
* with desktop and recommended software ( 3GB ) OR the smaller version ( 1.1GB ) can install add software easily
today its Debian version 12 (bookworm)
*2 boot ( on ethernet connection ) and find network IP of that RPI
like with linux: 'nmap' sudo apt install nmap -y
and use it ?with a alias?
in .bash_aliases
like alias fastnmap='nmap -sn 192.168.1.0/24'
or like if we used in RPI Imager setup an new name ( instead 'raspberrypi' ) 'rpi3'
we can just use ping rpi3.local -c 3
PING rpi3.local (192.168.1.103) 56(84) bytes of data.
64 bytes from 192.168.1.103 (192.168.1.103): icmp_seq=1 ttl=64 time=0.579 ms
64 bytes from 192.168.1.103 (192.168.1.103): icmp_seq=2 ttl=64 time=0.607 ms
64 bytes from 192.168.1.103: icmp_seq=3 ttl=64 time=0.611 ms
--- rpi3.local ping statistics ---
3 packets transmitted, 3 received, 0% packet loss, time 10092ms
rtt min/avg/max/mdev = 0.579/0.599/0.611/0.014 ms
to find its IP
or via router info
and terminal ? cmd
SSH remote login
ssh pi@192.168.1.xx
pw
*3 update and install tools like
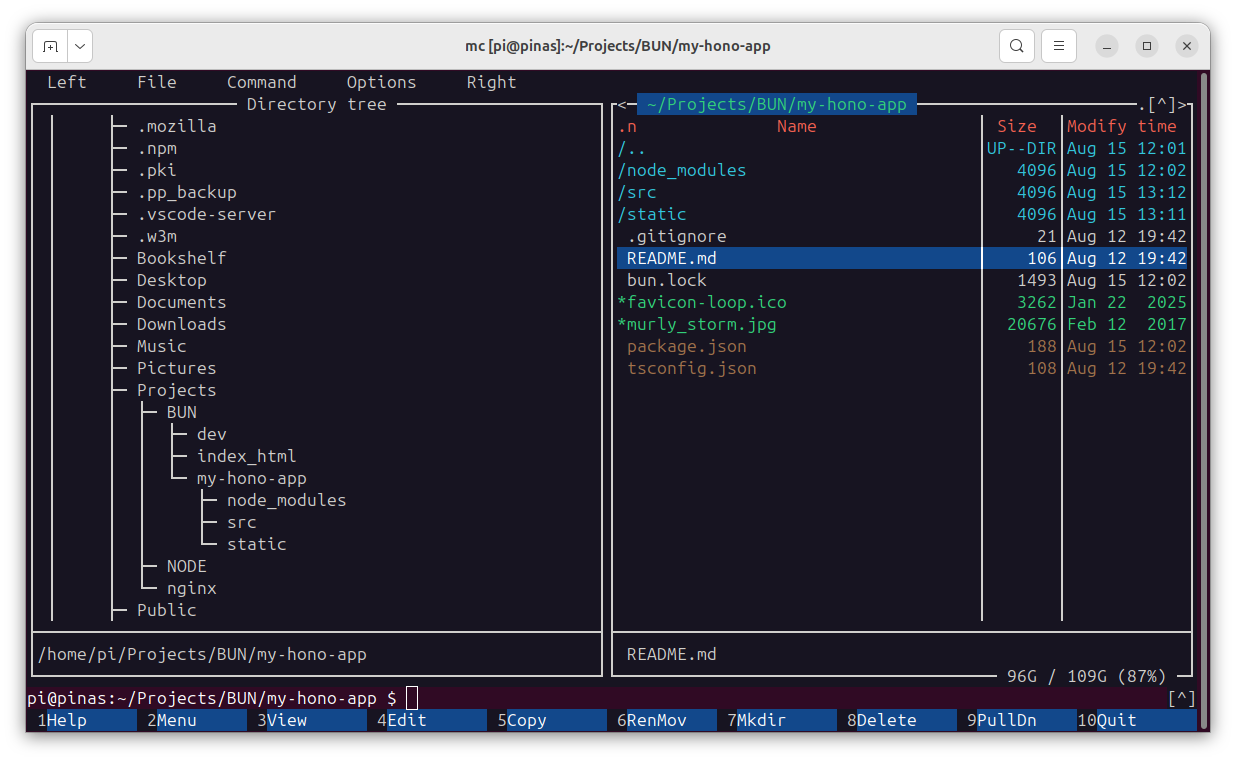
MC midnight-commander sudo apt install mc -y
* a 2 window file-manager
* what lets you use Linux terminal without knowing Linux commands
* and also works in a remote shh terminal ( what desktop file-manager can NOT do )
* and allow networking ( so i also use it on my main Linux desktop PC ) like for file transfer
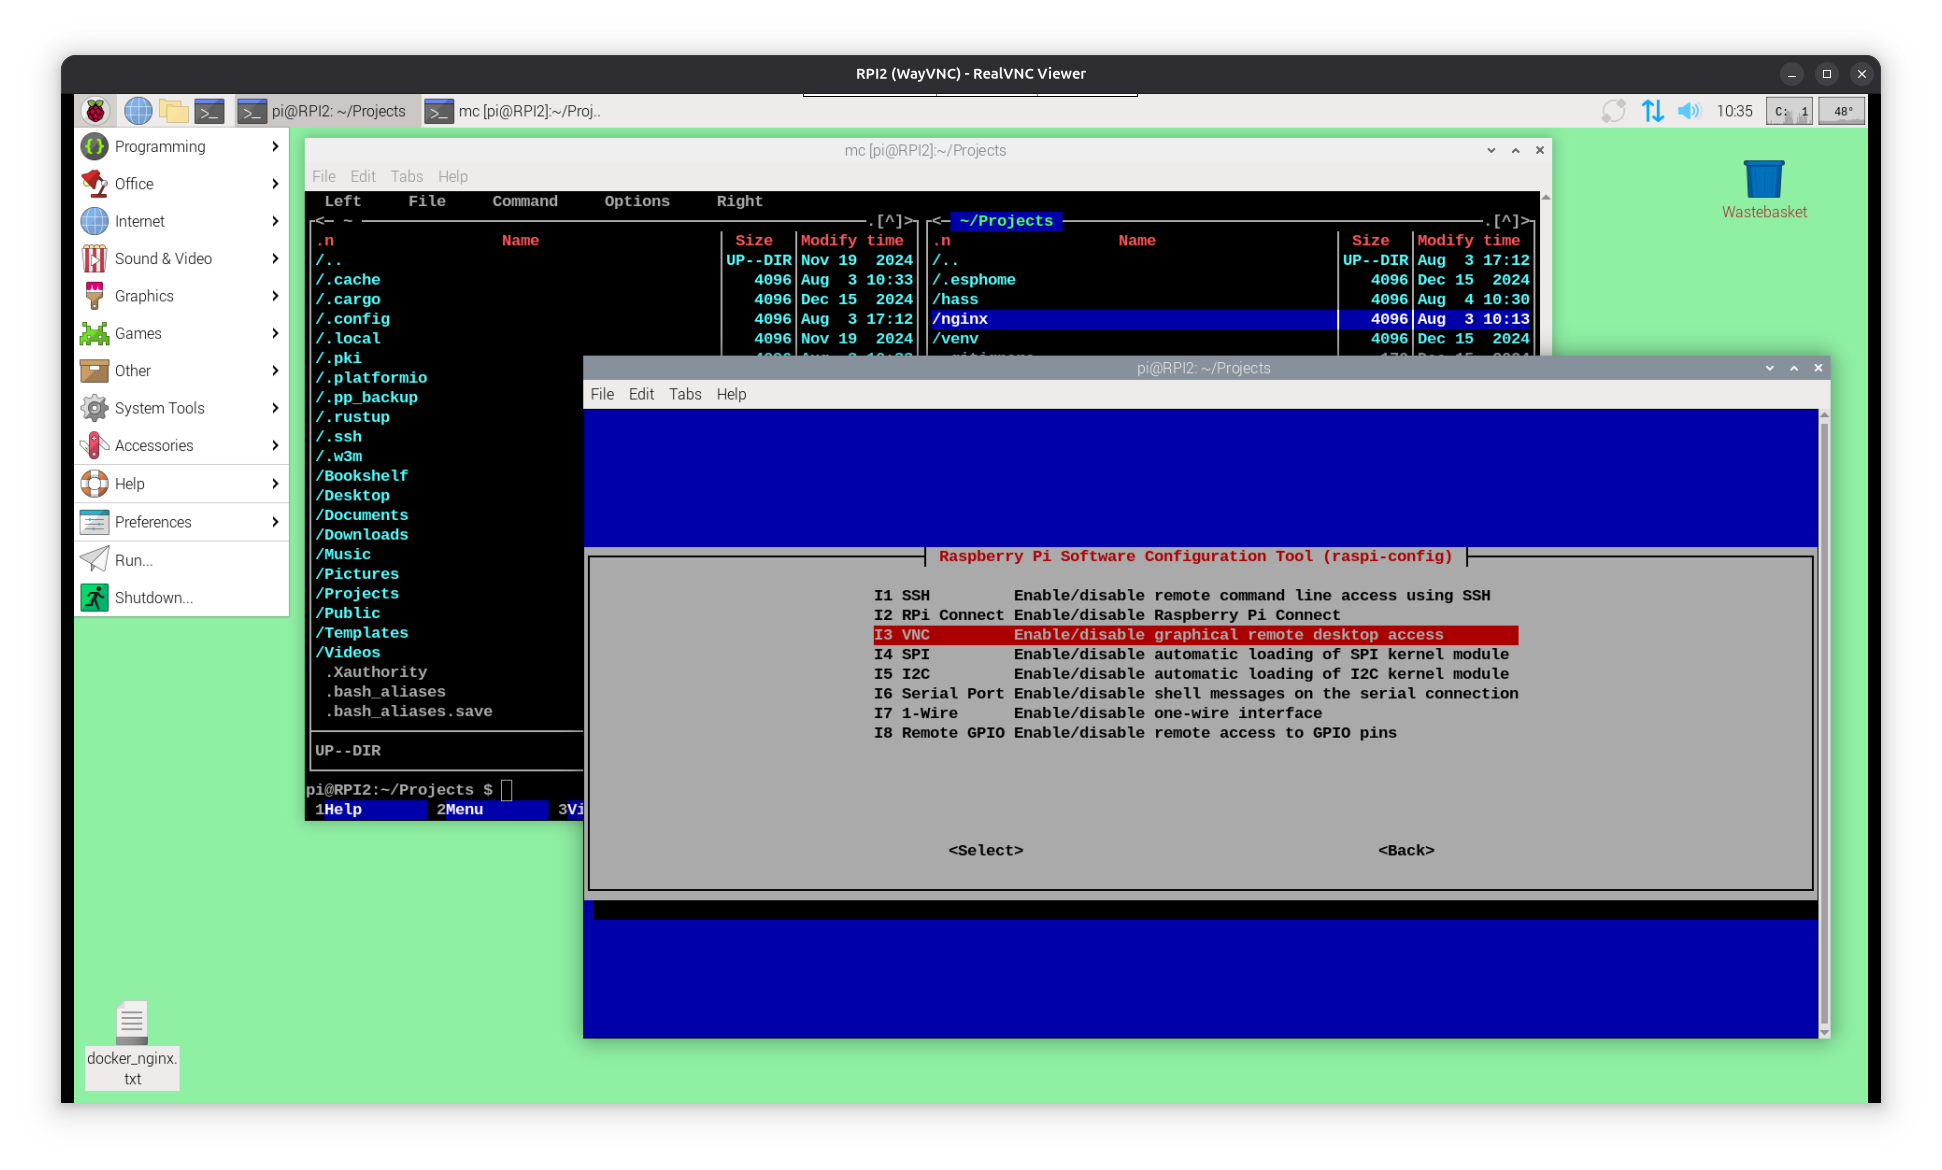
sudo raspi-config
set interface options / VNC enable ( if installed desktop version but want use 'headless' ) [YES]
also set WiFi country like [TH] if want WiFi enabled
and SSID and password
& give fix IP ( here for a RPI3 [192.168.1.103] )
using the NETWORK MANAGER Command Line Interface sudo nmcli c show
sudo nmcli c mod 'Wired connection 1' ipv4.addresses 192.168.1.103/24 ipv4.method manual
sudo nmcli con mod 'Wired connection 1' ipv4.gateway 192.168.1.1
sudo nmcli con mod 'Wired connection 1' ipv4.dns "10.10.30.1 8.8.8.8 8.8.4.4"
now also can give fixIP to WiFi: ( different ! ethernet 103 wifi 203 ) sudo nmcli c show
sudo nmcli c mod '< SSID>' ipv4.addresses 192.168.1.203/24 ipv4.method manual
sudo nmcli con mod '< SSID>' ipv4.gateway 192.168.1.1
sudo nmcli con mod '< SSID>' ipv4.dns "10.10.30.1 8.8.8.8 8.8.4.4"
& install docker curl -sSL https://get.docker.com | sh
*4 check docker by new made alias in file /home/pi/.bash_aliases : alias dinfo='echo "___ INFO" && sudo docker info && echo "___ CONTAINER" && sudo docker ps --all && echo "___ IMAGES" && sudo docker images && echo "___ NETWORKS" && sudo docker network ls && echo "___ VOLUMES" && sudo docker volume ls'
call it with dinfo
*5 install NGINX in a docker container
prepare a user dir: /home/pi/Projects/nginx/
and make a index.html file in it ( containing minimal a text line ) .
setup docker NGINX: sudo docker run -it --restart unless-stopped -d -p 8080:80 --name web -v ~/Projects/nginx:/usr/share/nginx/html nginx
and call it from other network browser via: http://192.168.1.102:8080/
now learn how to copy a local tested *.html file
via network to that server source dir RPI2: /home/pi/Projects/nginx/
for working HEADLESS
if your working environment is a windows PC i recommend to install bitvise ssh-client
what gives a remote SSH terminal and a file transfer tool to handle a headless RPI in your LAN
and also RealVNC® Viewer for Windows
if VNC server in RPI is enabled by sudo rapsi-config / 3. interface options / I3 VNC enable /
so can see / work from windows/linux PC your RPI
as my RPI2 is build into a RPI cluster ( tower of RPI2 / RPI3 / RPI4 ) i try
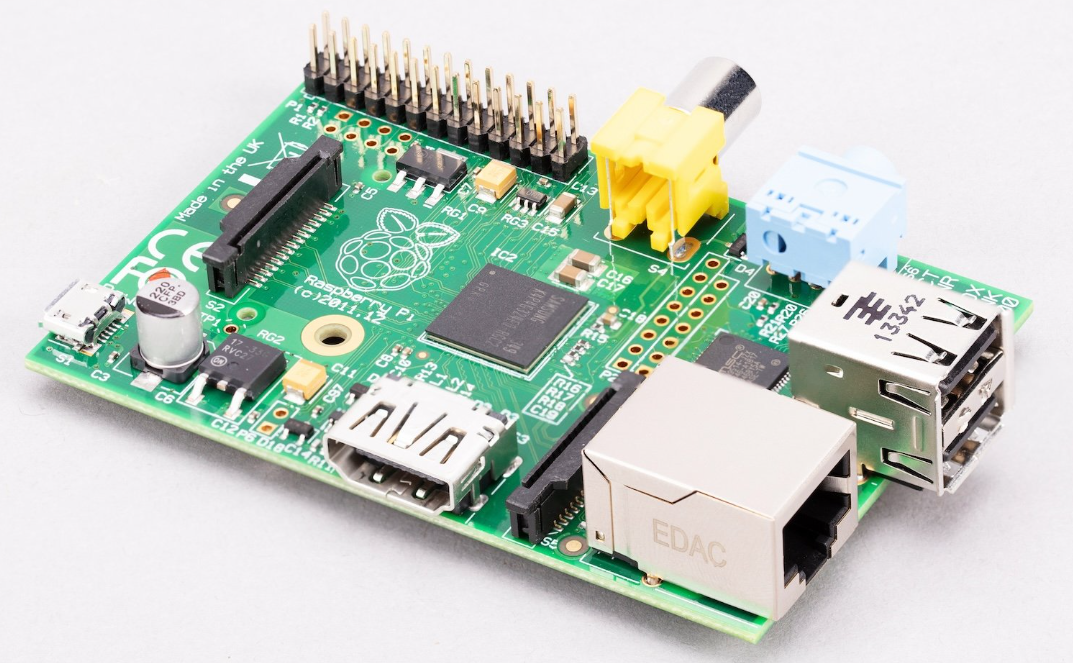
same on a even older RPI1 ( from 2011 ) fixIP [192.168.1.101] ( ethernet / has no WIFI / and only 2 USB2 / )
run updated Raspberry Pi OS desktop 32bit on a 16GB uSD in a SD card holder as no uSD slot!
and now add: docker & nginx install works fine.
while ssh and filetransfer works fine ( can use like filezilla... SFTP to RPI )
there is a more easy way: install use
sudo nano /etc/samba/smb.conf #add at end:
[RPI1_share]
path = /home/pi/Projects/nginx
writeable = yes
browseable = yes
public = no
sudo smbpasswd -a pi
pw
pw
sudo systemctl restart smbd
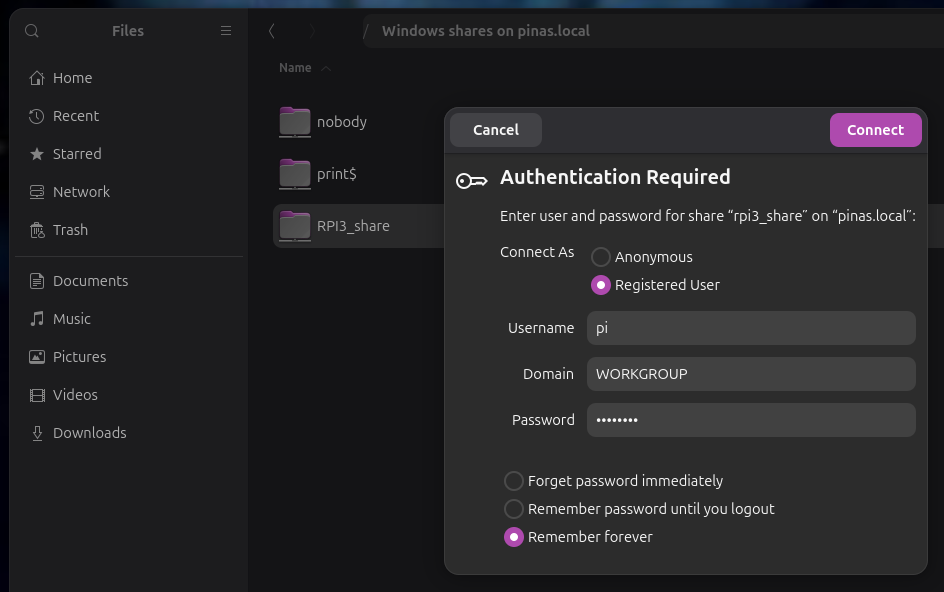
now from PC can use file-manager / network / find RPIx
login ( pi / pw ) required and use that exposed path like a network drive
example html code from my RPI nginx server at GIT
here is something you would not expect,
but i think it is a valid learning approach:
try HTML projects with
while that idea with a RPI as local web-server ( and it can do much more like file server / linux desktop .. )
is nothing big ( and above see here i use a old RPI for it, what not really would be used as internet browser desktop PC )
there is a even cheaper way, interesting for all who might want to tinker...
buy a * ESP or
* RPI PICO W
micro controller board and code your HTML inthere.
you see even on a 6$ WIFI computer like ESP or PICO W can make
* web-server
* user login protection ( of operation )
* link menu
* header / link menu / content / about / footer
* as responsive layout
* dynamic content
* operation 'buttons'
* timesync
* send data worldwide / remote MQTT
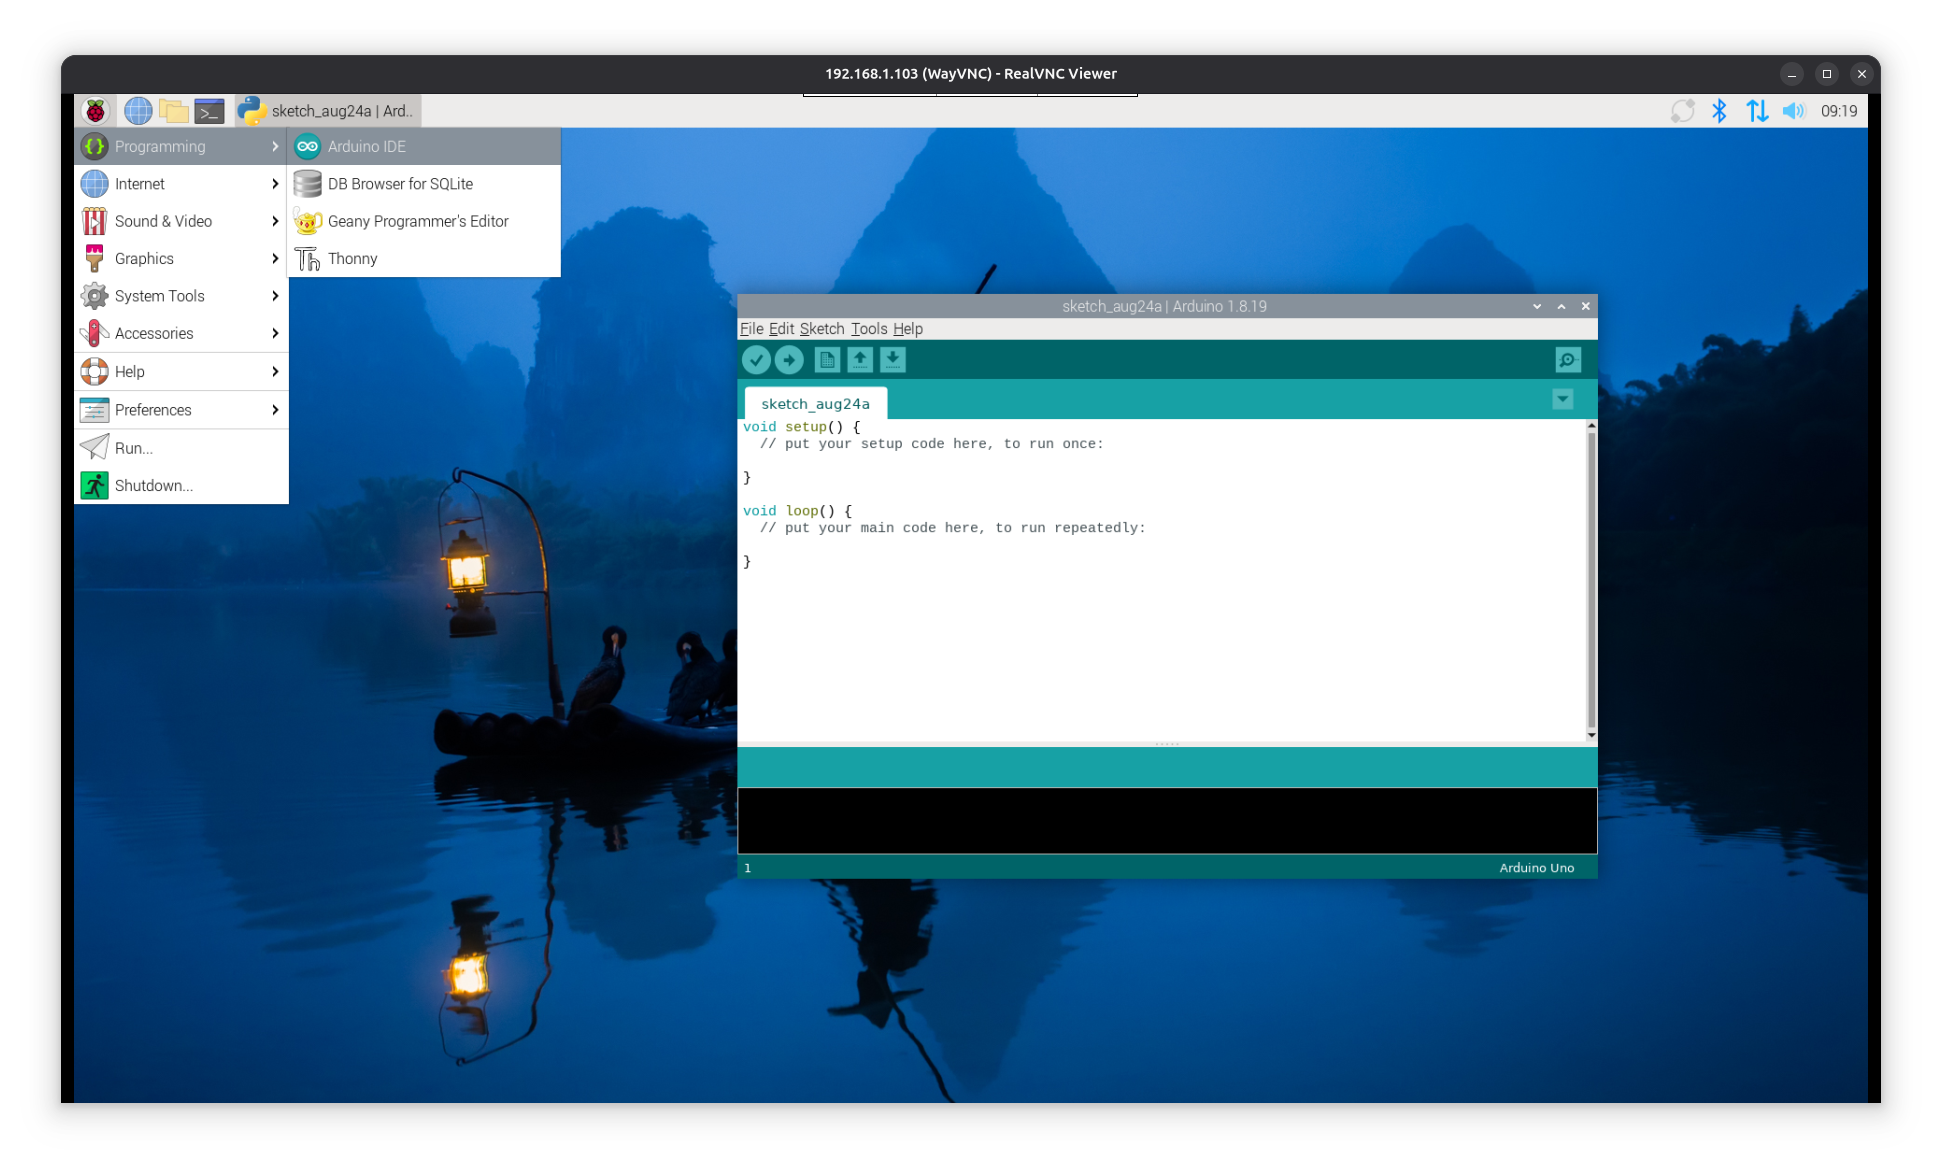
by a combination of Arduino C++ calls and HTML source code
compiled and uploaded from a Arduino IDE PC to that target board / here a PICO 2W raspberry-pi-pico-2-w-review
! to install (old) Arduino IDE on RPI 64bit ( here RPI3 )
cd ~/Downloads
wget https://downloads.arduino.cc/arduino-1.8.19-linuxaarch64.tar.xz
tar -xvf arduino-1.8.19-linuxaarch64.tar.xz
some hardware info, while the whole Raspberry Pi idea is about learning Linux and coding ( PYTHON )
RPI1 AND RPI2 can be used for a little server,
RPI3 already can use internet / browser ( but NOT: YouTube videos or even VScode )
RPI4 could use as mini office PC
RPI5 can even connect a M2_nvme SSD ( but i not buy until now )
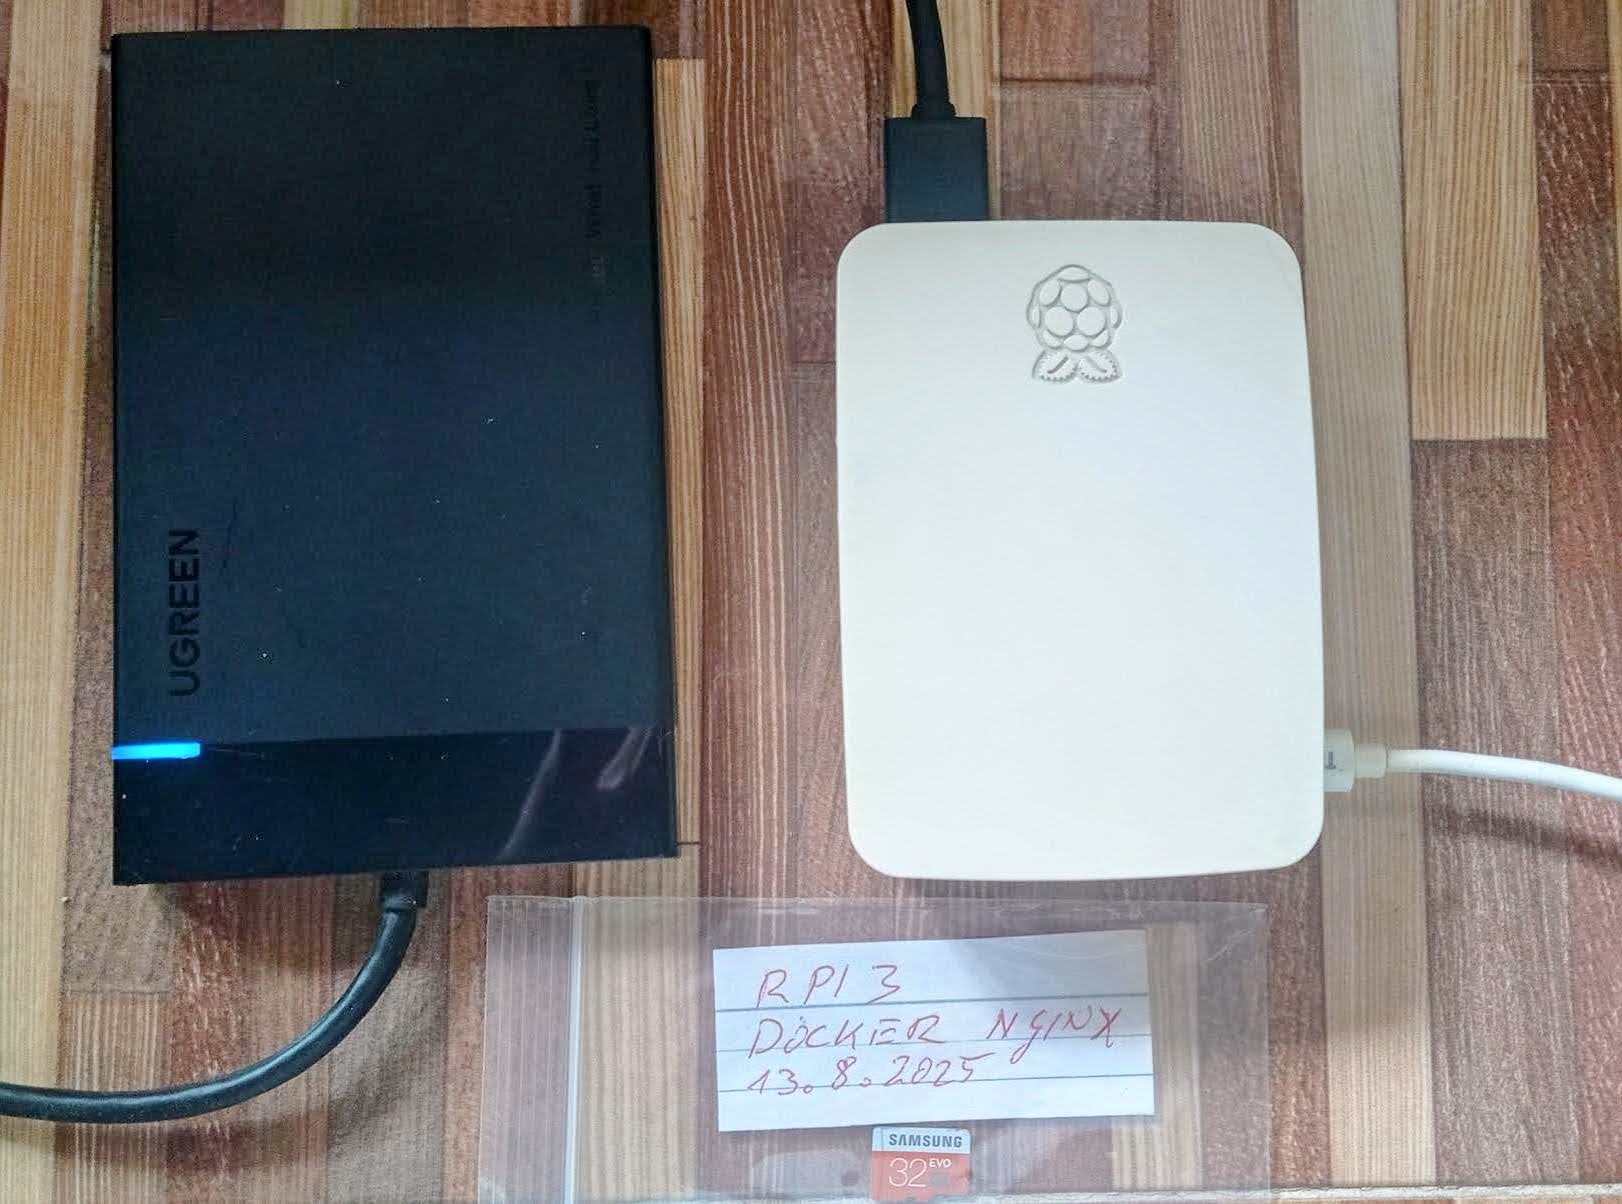
I just got back my second 'RPI3 B V1.2'
and re-burn the uSD for it with same setup as above...
but then connect ( on USB2 only ) a USB3 UGREEN sata TEAM 120GB SSD
and use the included 'SD copy tool' to transfer the OS.
for test using drive bench
Disk Read 33.81 MB/s
Disk Write 20.5 MB/s
a disappointing : Score: 2132 result details
but improved, compared to the initially used uSD 32GB Samsung evo:
Disk Read 21.73 MB/s
Disk Write 8.5 MB/s
and a terrible : Score: 980
and first try the samba share ( from Ubuntu 25 PC )
and using 2 file-manager windows ( drag drop ) to copy last 'webwork' templates
anyhow this is now more suitable for learning Raspberry Pi, Linux as the RPI1
but i want also try the 'learn WEB' next step: NODE / BUN JS environment ( with some frameworks )
? deployment to NGINX
so while it looks professional ( and easy to handle )
to install / use first
nvm Node Version Manager
in my line of work i not use it, as it created problems with a other server tool i use / develop with / frequently: 'Node red'
so here ( now the RPI3 ) a installation of
well it is not the job now, but be aware that you can use JS also
to play with the RPI hardware ( GPIO ) see w3schools.com/nodejs
alternative to Node can install ( additionally ) but as a future replacement of Node
! need to have a arch64 system or install will fail without warning !
curl -fsSL https://bun.com/install | bash
( need to refresh terminal ) and check: bun -v
shows 1.2.20
for play, first better make new subdirs like: mkdir /home/pi/Projects/NODE/
mkdir /home/pi/Projects/BUN/
under there can start some projects.
pls understand that even the smallest example will
get/download tools from internet, often megabyte and hundred of files...
what makes it difficult to make backup / or cleanup later...
( so drive space is a issue )
i use a alias ( in file .bash_aliases ) alias dh='df -Th && lsblk'
what shows 7GB of 111GB ( root drive ) used already
and alias treesize='tree --du -h'
to find where all the space is used
so first would be just to start a development server,
mkdir dev
cd dev
npm init
( modify the scrip part of 'packet.json' )
and create a
node run index.js
and see: Server running at ...
start browser and see
Hello, World from NODE server!
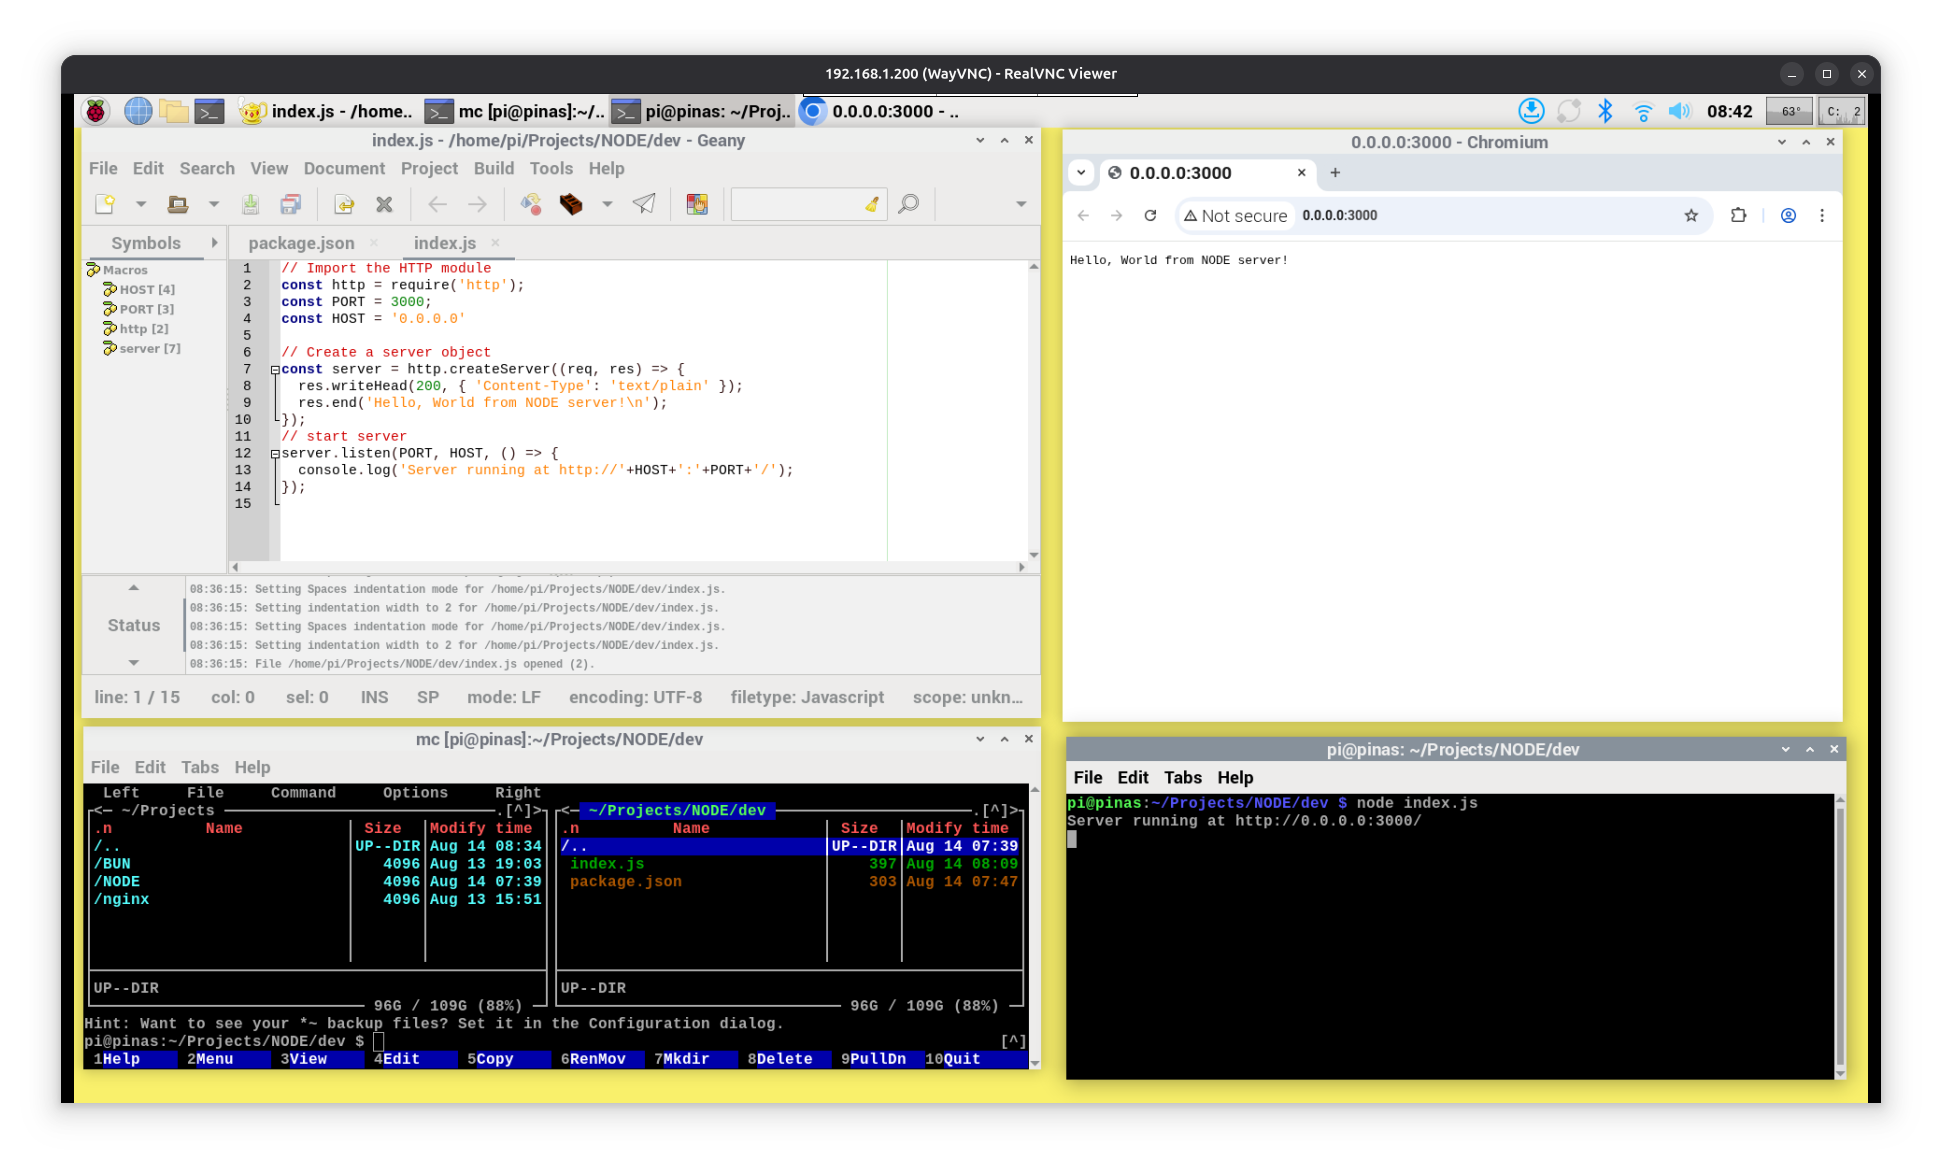
working environment
above show to work in RPI desktop,
use the installed
* GEANY IDE for file editing,
* mc for file handling
* terminal for start node app
* local browser call 0.0.0.0 or localhost
if work remotely better have 2 remote terminal windows open with
* nano index.js
for edit ( [ctrl][o][enter] save after edit but not need to close )
* node index.js
for run
and a ( remote ) browser window to http://192.168.1.103:3000
( remote only works if HOST == '0.0.0.0' , not if it is 'localhost' )
but i have a Ubuntu 25.04 desktop i work from
where i have 'kate' installed
and in a terminal can use for a RPI3 remote file:
kate sftp://192.168.1.103/home/pi/Projects/BUN/dev/index.ts
user pi
pw
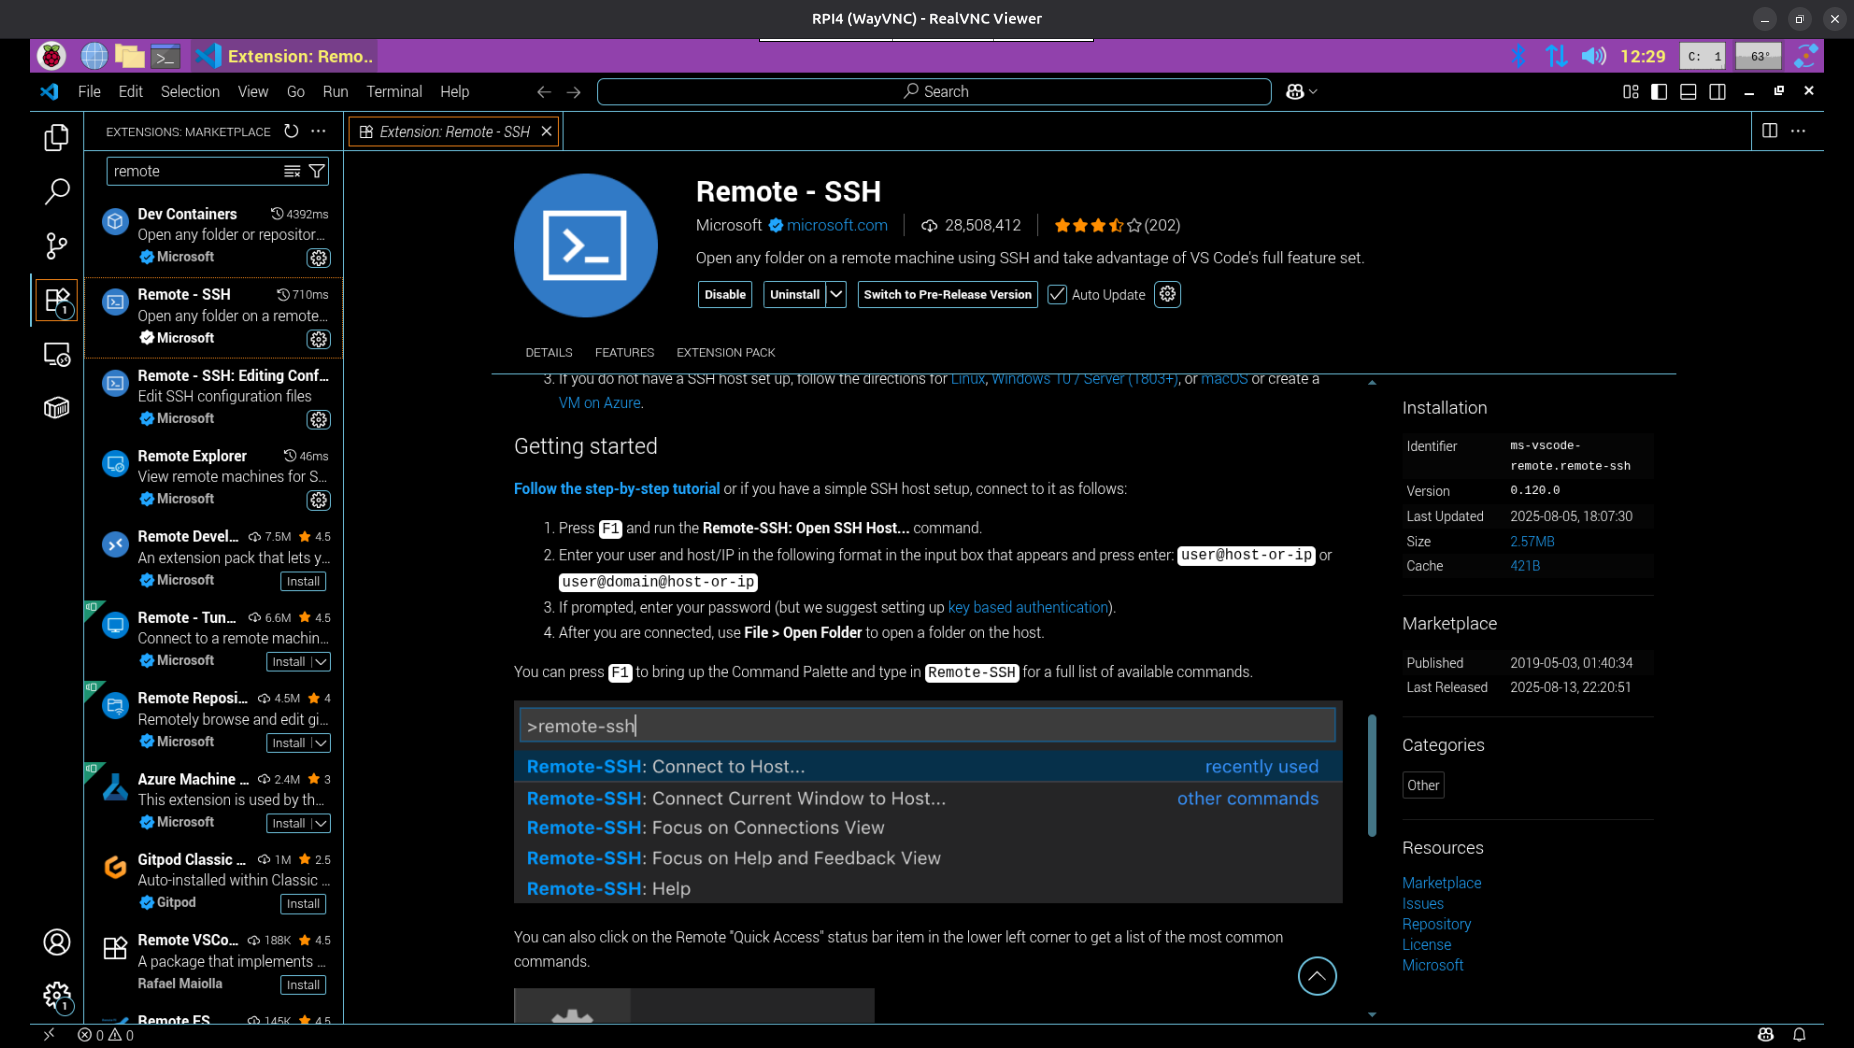
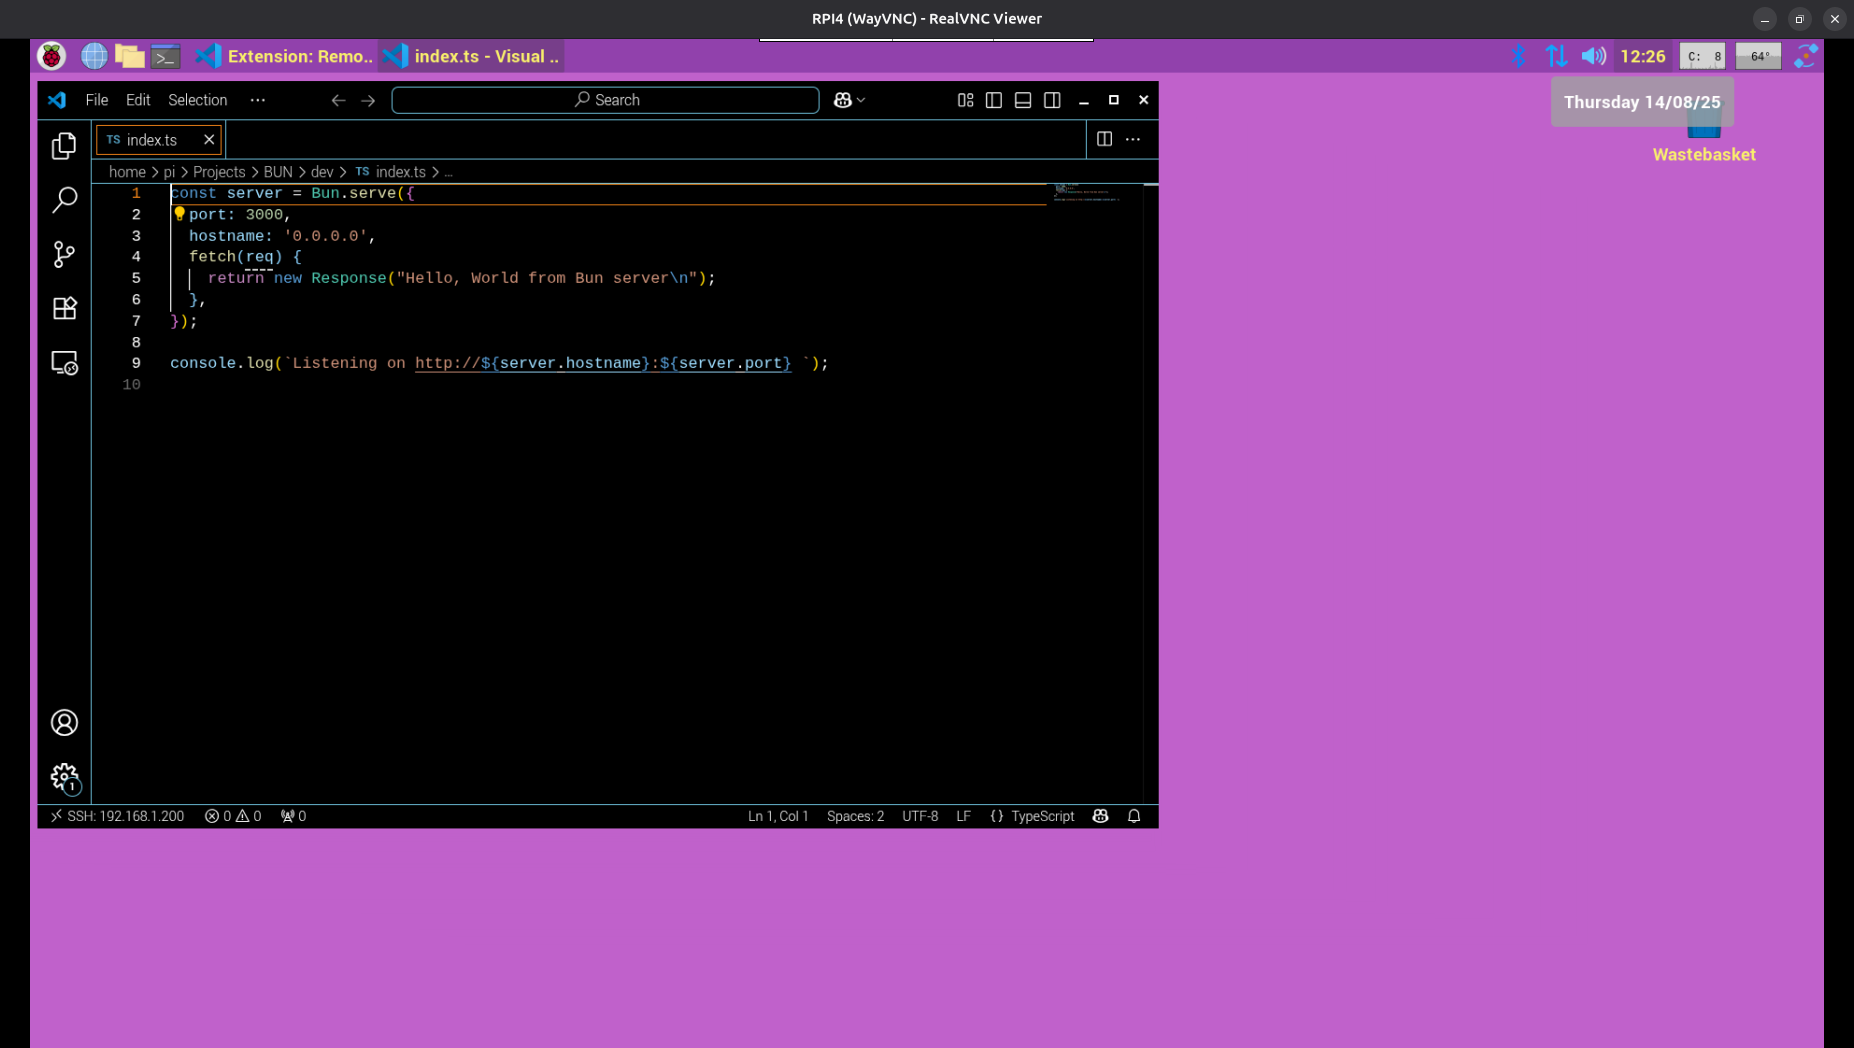
but i do have VScode on my RPI4
and can use it ( remote SSH extension ( need configure hosts first ))
[F1] remote SSH
pi@192.168.1.103
pw
cd /home/pi/Projects/BUN/ mkdir dev
cd dev
bun init ( type: blank )
that here already install 7 packages,
and allow directly to use bun run index.ts
but only does a console print
( yes, its .ts type script instead java script // just more safe ??? )
( check treesize : 29MB !!! )
now that we rewrite to do a similar server job as in our Node test.
Note:
when you print ( .log ) at server start
http://0.0.0.0:3000
it will appear at console already 'context sensitive' ( underscored ) aka can right click, and allow to start it in local browser.
there are many examples out there what not follow the correct syntax and not work this way.
but best is to print the real IP like
http://192.168.1.103:3000
what can be used to start in remote browser too.
well printing a static text into a browser window is low level..
we started in ?windows?linux? desktop, made a file 'index.html'
and double click it to see the result in browser
to do same in node / bun seems very difficult
i did complain about that ( need a GIT account and file a issue at BUN )
( actually not because it does NOT WORK, i complained that it shows a WRONG ERROR response ) GIT issues
and got a lot of bad comments for it, not only at that issue post, even at 'twitter'
BUT somehow i got through to him and that feature is now added: bun docs mkdir index_html
cd index_html
touch index.html
nano index.html
bun index.html
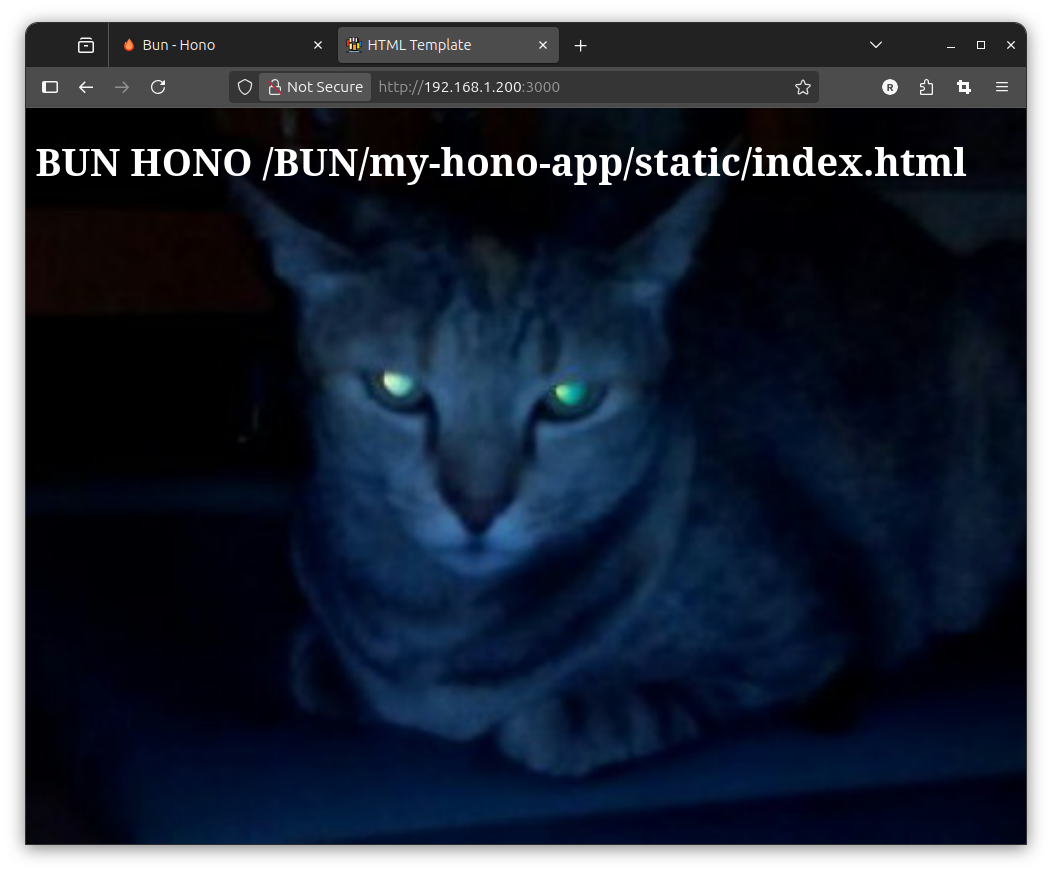
but the good way would be still to call the index.html
from inside the index.ts
run into heavy problems with NODE and BUN using newer versions like VITE / REACT ...
what not work on Raspberry Pi ?anymore? ( try on RPI3 and RPI4 )
as i have a 2 year old vite app what still works well with newest BUN
possibly can install Node / Bun on Ubuntu PC ?
and next we explore the use of a often used framework
deep dive video node js_express bun js_express express js and on YouTube
try on RPI3
mkdir home/pi/Projects/NODE/NODEJS_EXPRESS
cd home/pi/Projects/NODE/NODEJS_EXPRESS
npm init -y
npm install express
touch server.js
nano server.js
node server.js
with a LAN browser:
http://192.168.1.103:3000
now try:
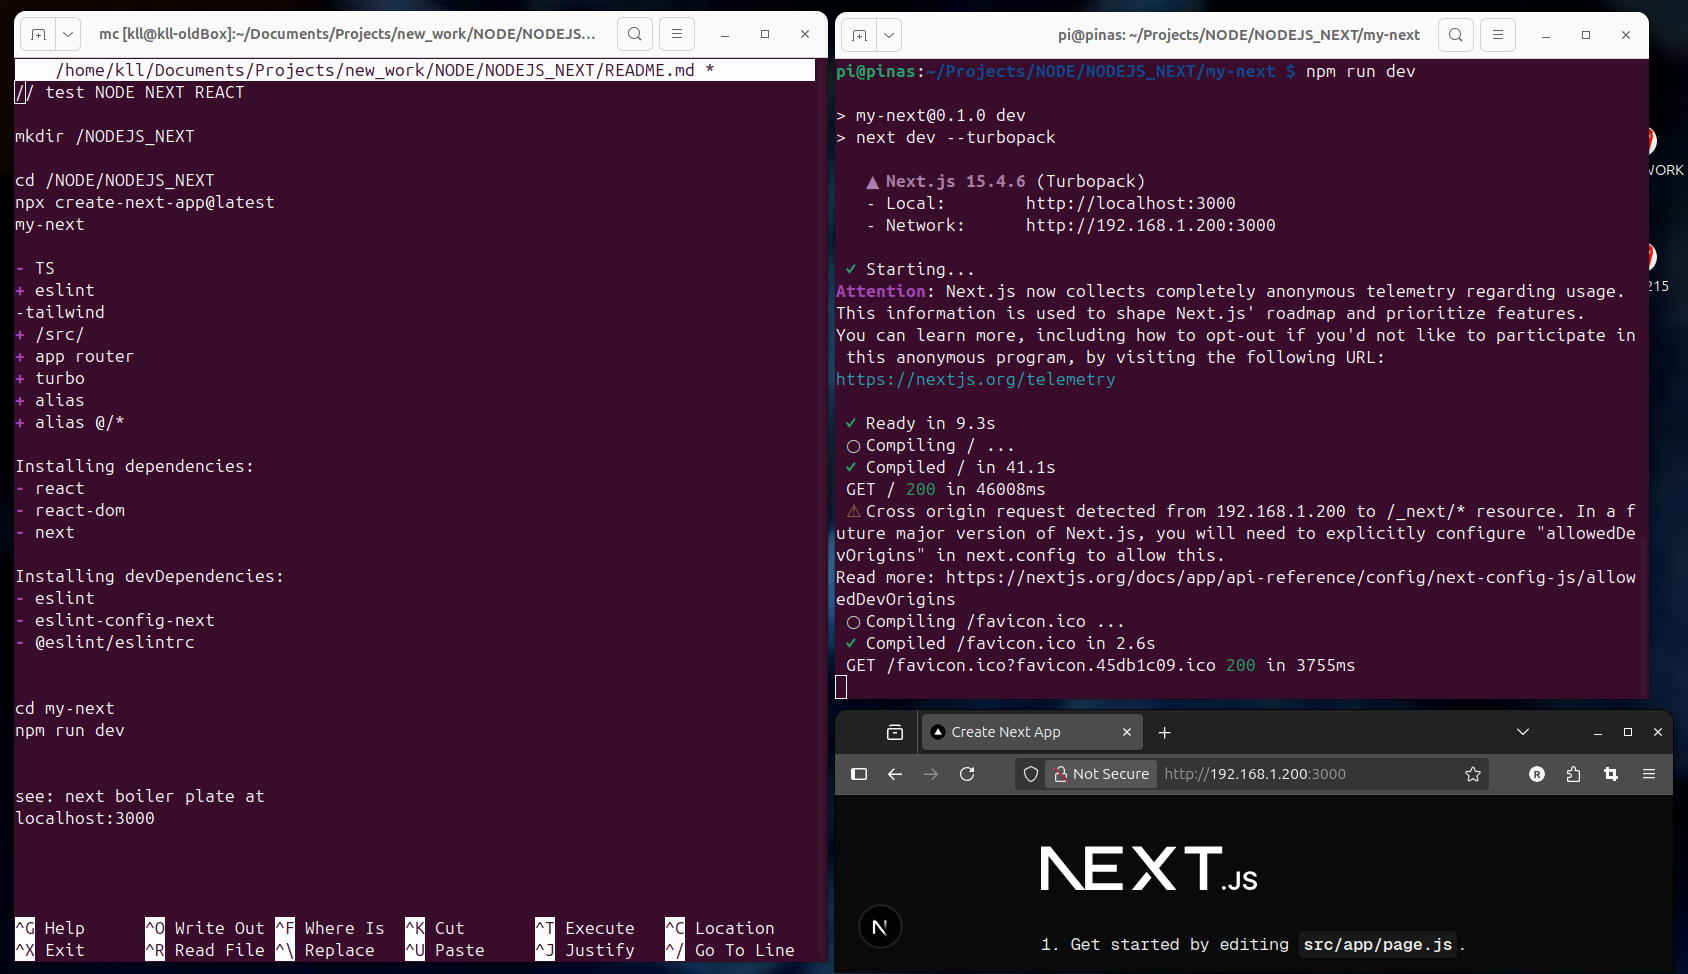
NODE NEXT
a node react ( again ) and it worked on RPI3
mkdir /NODEJS_NEXT
cd /NODE/NODEJS_NEXT
npx create-next-app@latest
my-next
- TS
+ eslint
-tailwind
+ /src/
+ app router
+ turbo
+ alias
+ alias @/*
see:
Installing dependencies:
- react
- react-dom
- next
for BUN NEXT follow this
and there is a next level ( if you check on the VERCEL templates: ) next templates
so instead of the NEXT basic you can install a ready example app npx create-next-app --example blog-starter blog-starter-app
cd blog-starter-app
npm run dev
see:
✓ Starting...
✓ Ready in 10.6s
○ Compiling / ...
✓ Compiled / in 47.1s
GET / 200 in 51609ms
- - so after one minute see at
http://192.168.1.103:3000
now under _posts
add a new blog entry ( file )
kll.md
filling following entries:
as we run in 'dev' mode,
you just add a additional /-posts/x.md file
( and add 2 pictures )
and refresh browser to find that new blog entry in the overview,
click it and see the detail article / BLOG
now that MD thing you anyhow have to learn:
it is a easy way to do some HTML styling
most known for the README.md file at GIT GIT MD help
now a server what uses *.md file needs to run a md preprocessor to render HTML.
above mentioned that in cases with database usage the SQL language is required
and already install SQLite and a SQLite file browser on RPI already.
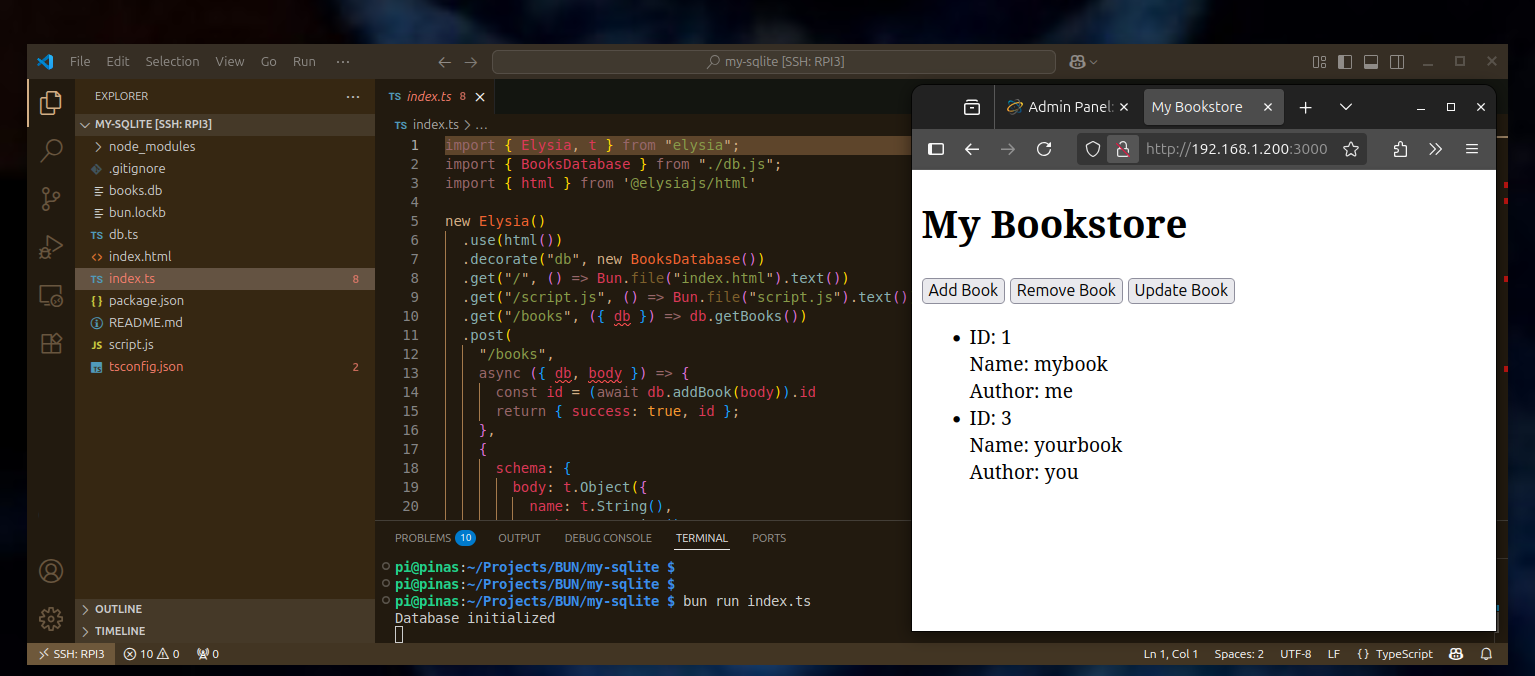
here we try using BUN and its build in SQLite driver
we use a ready example from https://github.com/gaurishhs/bun-web-app/
by just download the ZIP: wget https://github.com/gaurishhs/bun-web-app/archive/refs/heads/main.zip
and unzip it into /BUN/my-sqlite/
in there need bun install
see:
bun install v1.2.20 (6ad208bc)
bun run index.ts
see only:
Database initialized
try:
http://192.168.1.103:3000/
it uses like JS code
// Get all books
async getBooks() {
return this.db.query('SELECT * FROM books').all();
}
with SQL commands send to db query function SELECT * FROM books
it also uses the framework Elysia JS
a faster Express.js replacement.
yes, the 3 buttons [ADD] [REMOVE] [UPDATE]
and the one line [ name,author ]
input field comes poor
but it works
try follow: BUN BUNDLER
under
/home/pi/Projects/BUN
/home/pi/Projects/nginx
make new sub dir
/bun_build_test
each
in
/home/pi/Projects/BUN/bun_build_test
use: bun init
+ REACT
now find:
/home/pi/Projects/BUN/bun_build_test/src/index.tsx
...
in
/home/pi/Projects/BUN/bun_build_test
read package.json
use first: bun dev
and check:
http://192.168.1.103:3000/
back stop with [ctrl][c]
and use bun run build
~/Projects/BUN/bun_build_test $ bun run build
see:
$ bun build ./src/index.html --outdir=dist --sourcemap --target=browser --minify --define:process.env.NODE_ENV='"production"' --env='BUN_PUBLIC_*'
Bundled 14 modules in 557ms
yes, Raspberry Pi is a strong supporter to learn PYTHON
and there are also potent web development tools for it,
a built in web-server and add tools like FLASK DJANGO werkzeug ...
i not want to get into Python much here,
BUT i need to mention one thing:
easy test the built in server:
mkdir PYTHON
cd PYTHON
nano index.html
add some text save and type ( in terminal of that dir ): python3 -m http.server
or with port if 8000 is used already:
python3 -m http.server 1234
it is one python code what runs a very potent web file server
( from any browser )
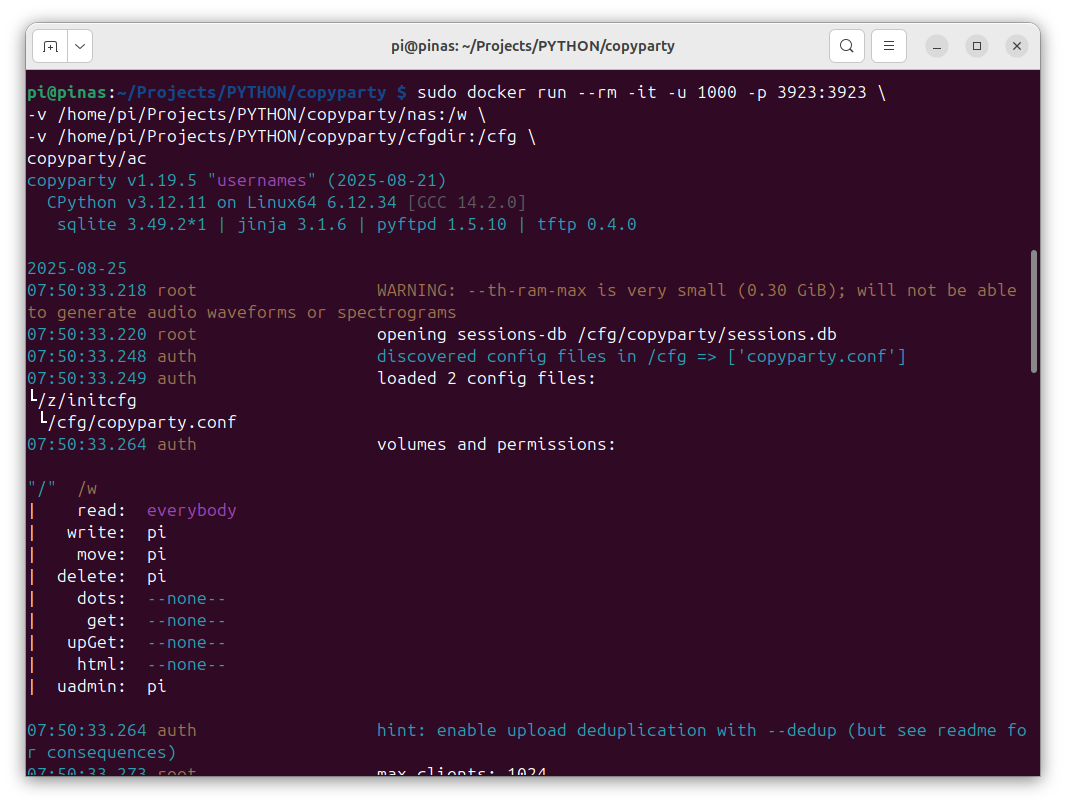
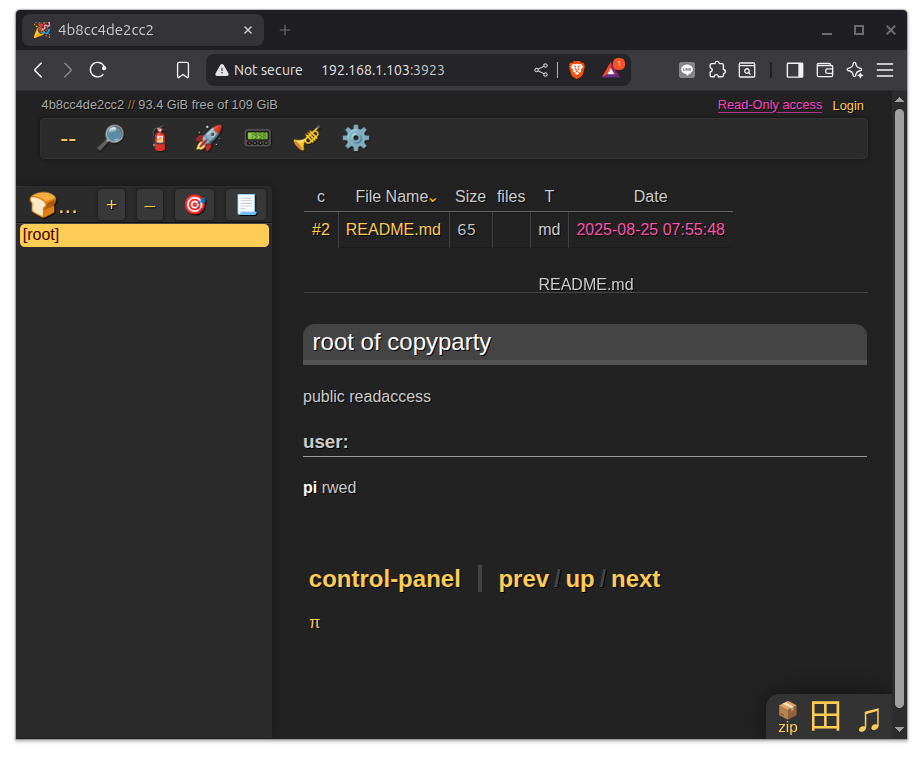
and i use the docker version ( but with local volumes ) ~/Projects/copyparty/nas/ ( here the uploaded / served files are ) ~/Projects/copyparty/cfgdir/copyparty.conf ( here is the config see GIT examples or my below basic config picture )
and for this the test docker start is: sudo docker run --rm -it -u 1000 -p 3923:3923 -v /home/pi/Projects/PYTHON/copyparty/nas:/w -v /home/pi/Projects/PYTHON/copyparty/cfgdir:/cfg copyparty/ac
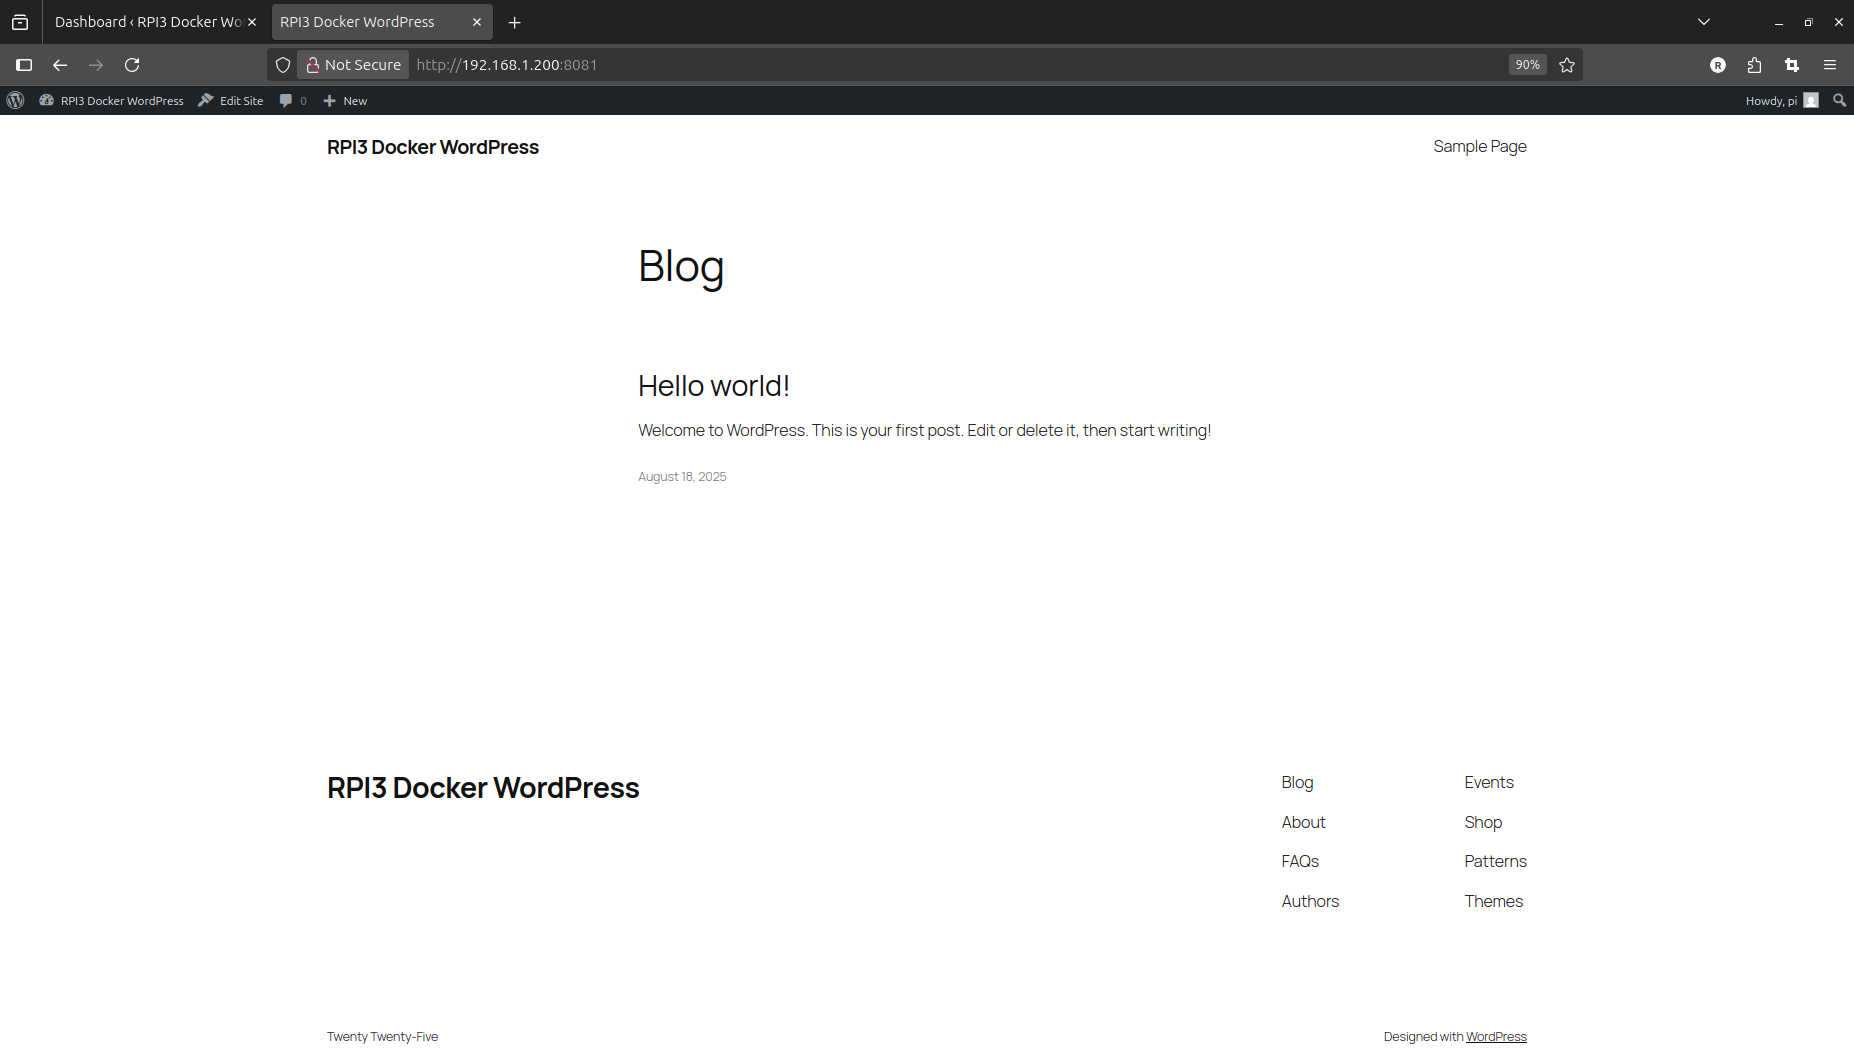
now at last we could make a complete new server setup "LAMP"
and install WordPress on it,
OR
try use docker containers
on RPI3
+ docker itself is already running
+ + and our NGINX container with the HTML tests of /home/pi/Projects/nginx/index.html ...
+ + + check with 'dinfo' alias
https://pimylifeup.com/docker-wordpress/
! that did not work out on RPI3 ??
https://www.kevsrobots.com/blog/wordpress-on-docker.html
! also not work: no matching manifest for linux/arm64/v8
-a- i like the 'web-interface'
esp like file transfer ( upload download ..)
? the data are INSIDE that container ( and gone if i delete the container )?
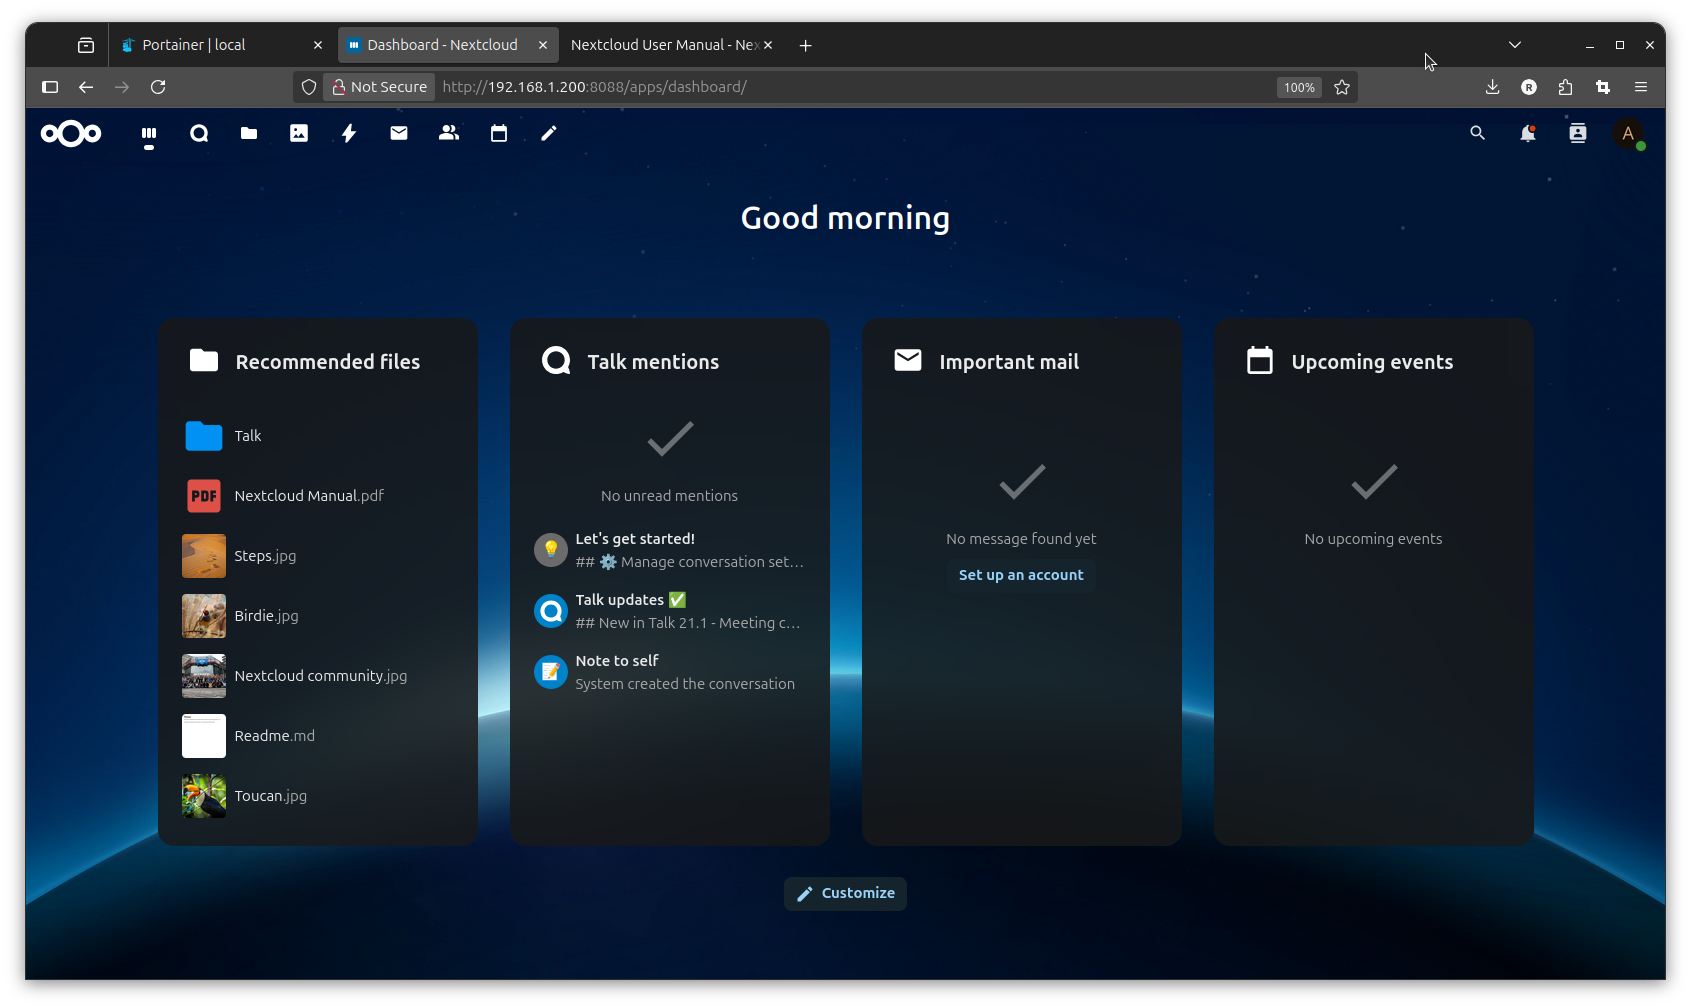
oh, i did found nextcloud files at ( a uploaded image file and moved to photos )
need 'sudo'
RPI3: /var/lib/docker/volumes/data/_data/admin/files/Photos/
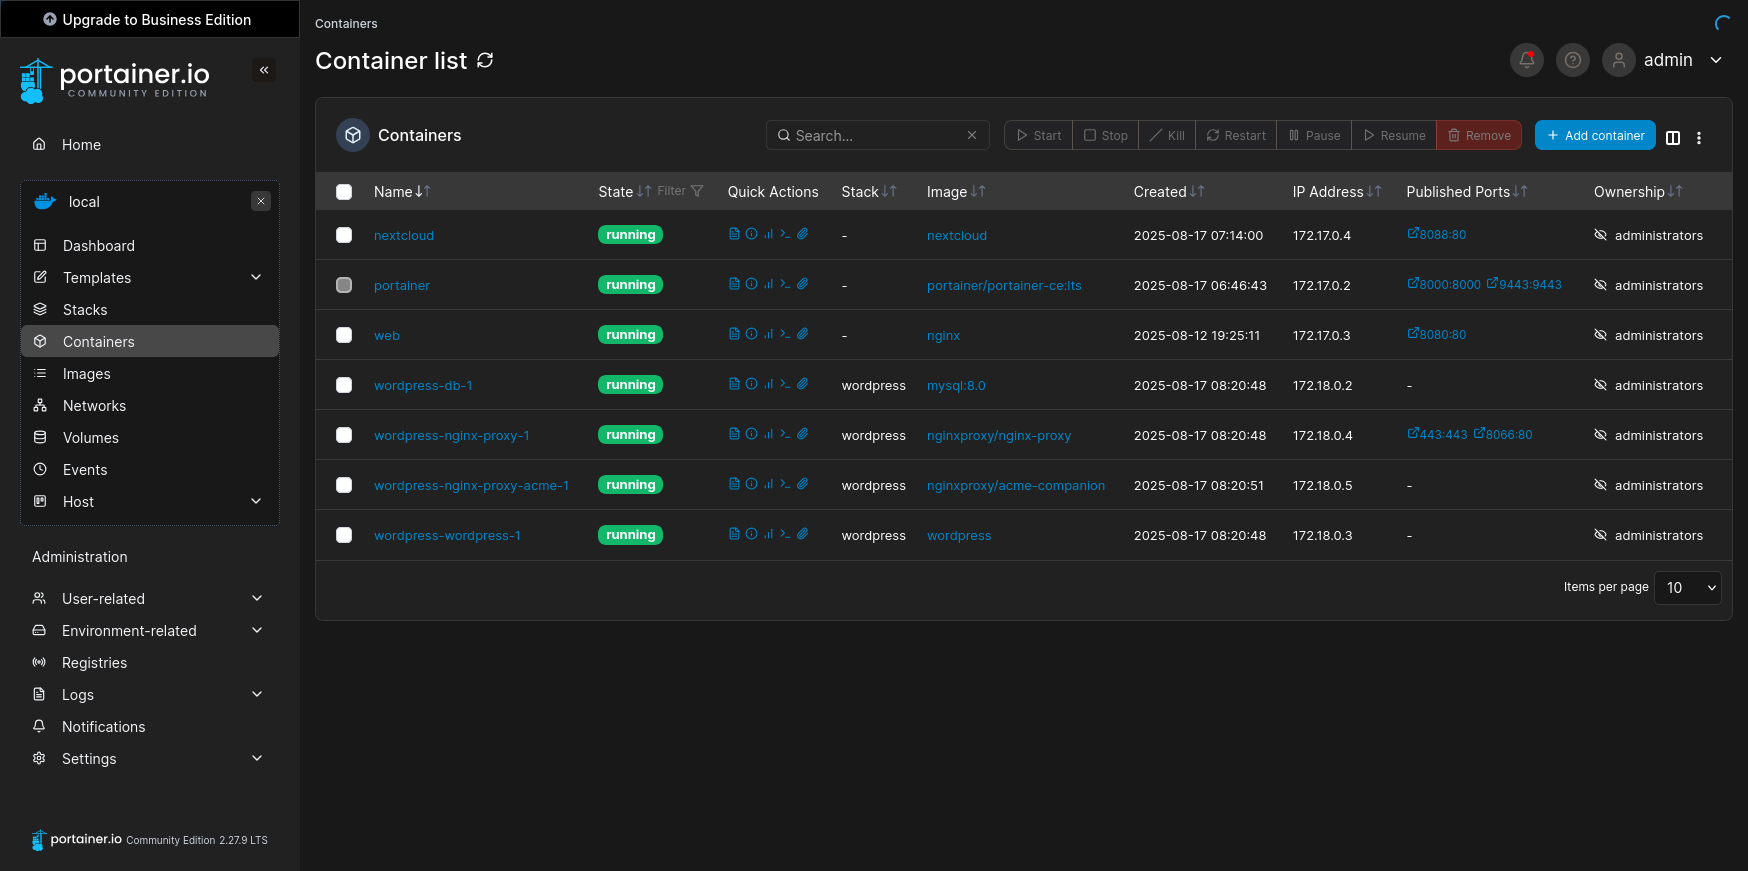
( it was portainer what show me that info )
but i would like to use that tool also to handle like a shared folder of the
RPI3:/home/pi/Projects/
from there? well this sounds interesting: git tutorial video
-b- from internal app store install
'maps'
-c- no idea how to get that 'own cloud office' to work?
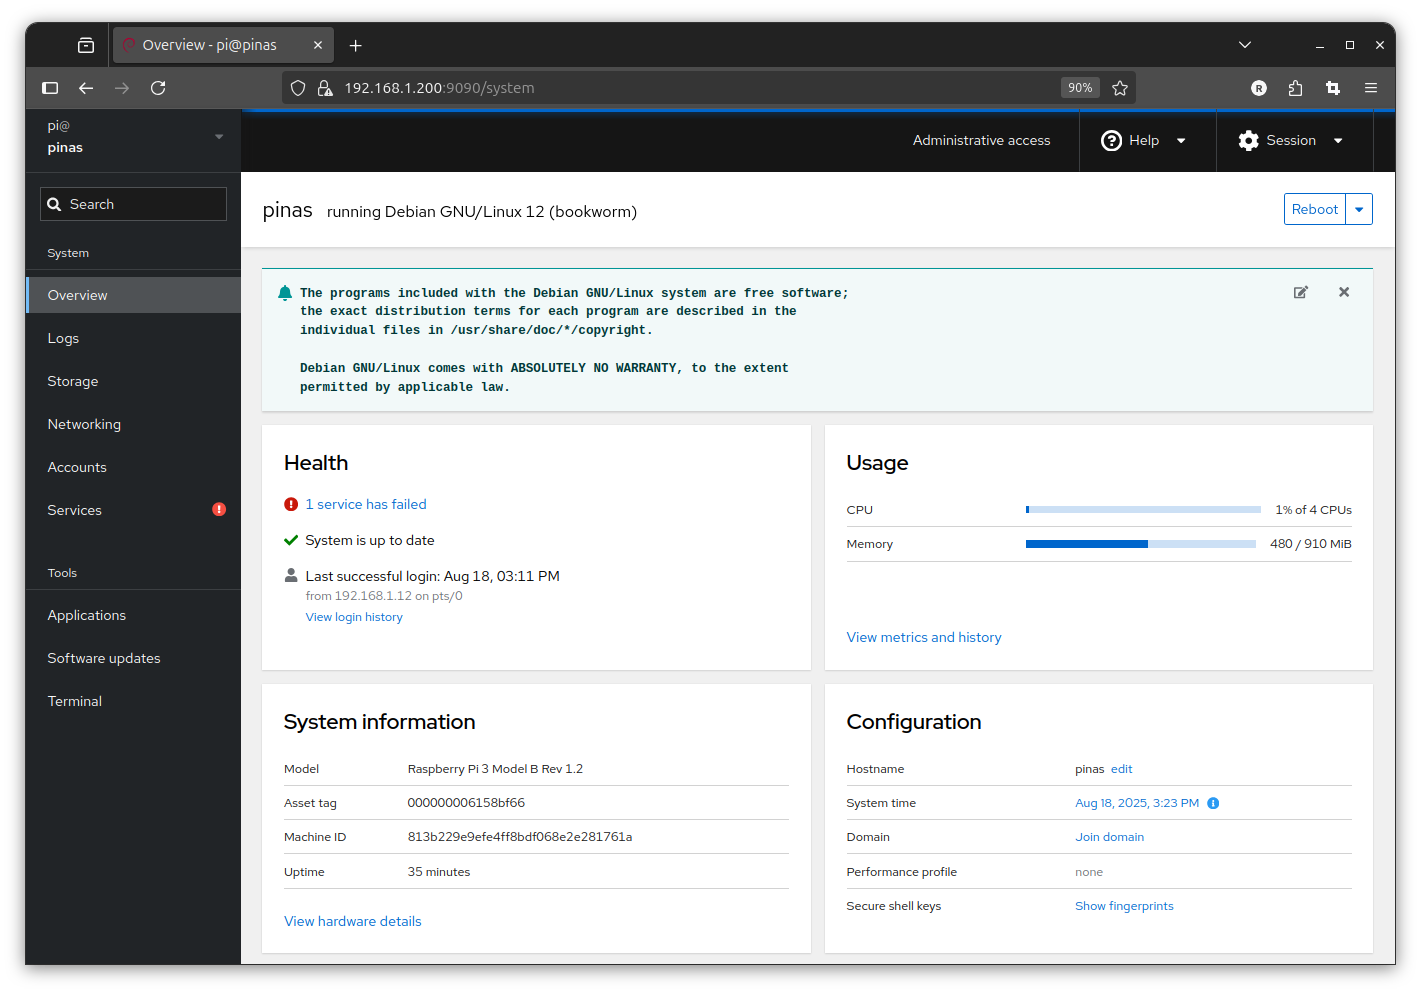
as we are into making web-pages from the raspberry,
why not have a easy web console too
here i just want to mention that there is a official way to reach your Raspberry Pi from the internet
but you need a online account. that helps to link your remote browser via a tunnel into yur Pi at home.
that is free as there is no dataflow via the Raspberry Pi company, just a 1 to 1 connection. connect
complete different setup RPI3:
for many server applications actually must not use linux desktop
instead just linux like Raspberry Pi OS Lite 64b
uSD for RPI1 ..4 should be A1
for RPI5 A2 ( Sandisk Extreme Pro 32 .. 128 GB for Raspberry Pi 5 )
7.8.2025
32GB uSD samsung evo
RPI3 on USB SSD
start Raspberry Pi Imager ( with option settings
burn RPI3 Raspberry Pi OS Lite 64bit
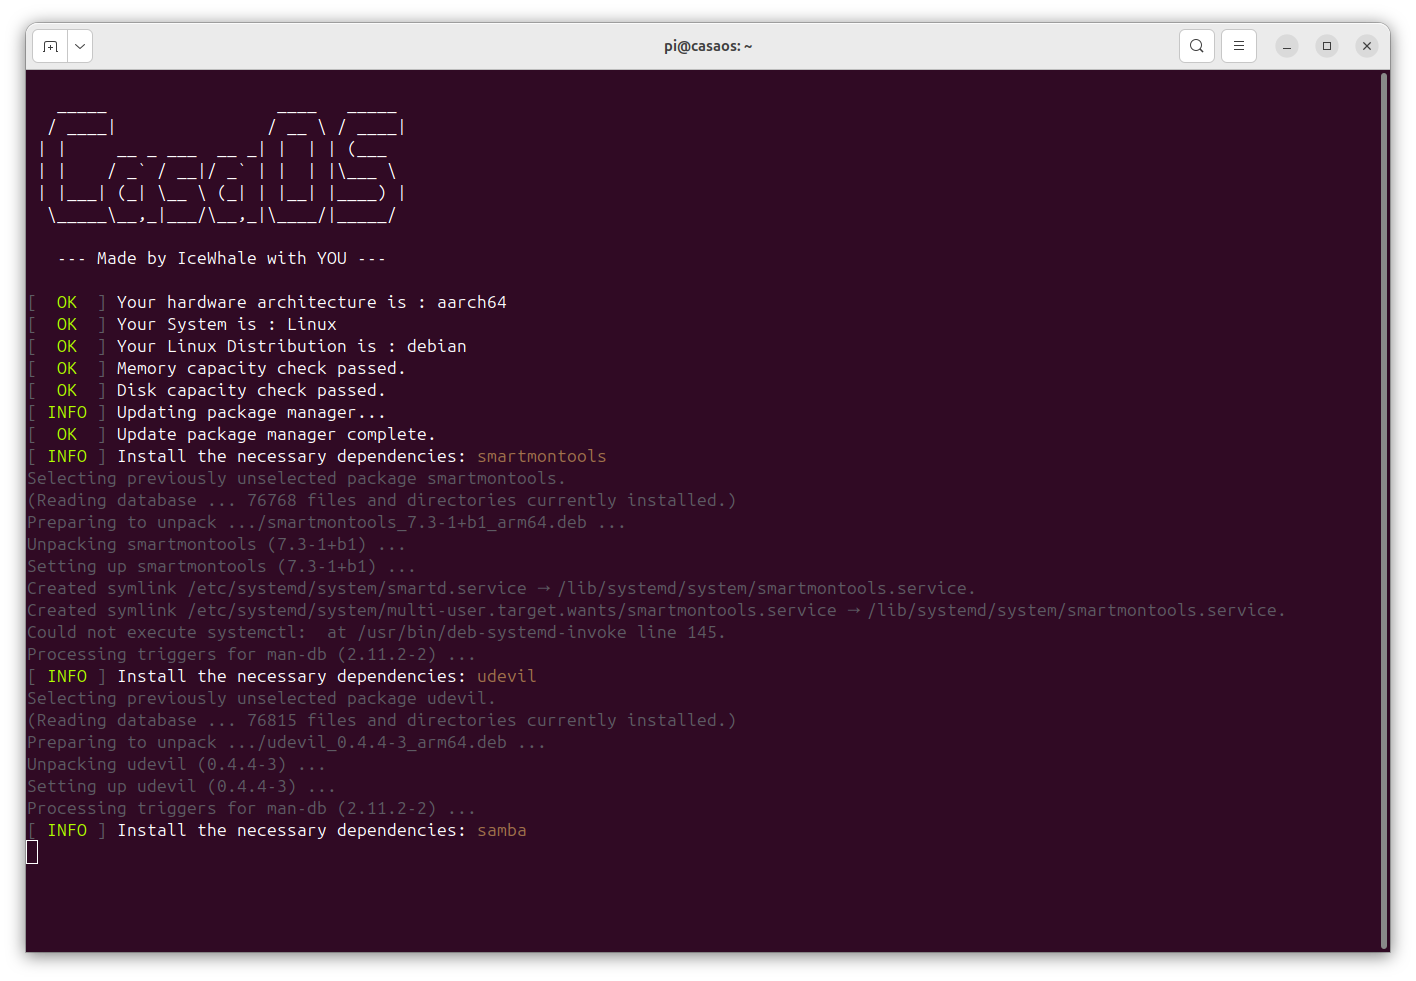
host: casaos
user: pi
pw:
+ wifi (TH)
+ SSH enable
boot in RPI3:
login from PC: ( hoping wifi login works )
ssh pi@casaos
or
ssh pi@192.168.1.9 ( after find IP with nmap )
pw
sudo apt update
sudo apt upgrade -y
FIX-IP .100 .200
for ETHERNET:
sudo nmcli c show
sudo nmcli c mod 'Wired connection 1' ipv4.addresses 192.168.1.100/24 ipv4.method manual
sudo nmcli con mod 'Wired connection 1' ipv4.gateway 192.168.1.1
sudo nmcli con mod 'Wired connection 1' ipv4.dns "10.10.30.1 8.8.8.8 8.8.4.4"
and for WIFI: see your SSID, or here 'preconfigured' as i burn SSID in settings
sudo nmcli c show
sudo nmcli c mod 'preconfigured' ipv4.addresses 192.168.1.200/24 ipv4.method manual
sudo nmcli con mod 'preconfigured' ipv4.gateway 192.168.1.1
sudo nmcli con mod 'preconfigured' ipv4.dns "10.10.30.1 8.8.8.8 8.8.4.4"
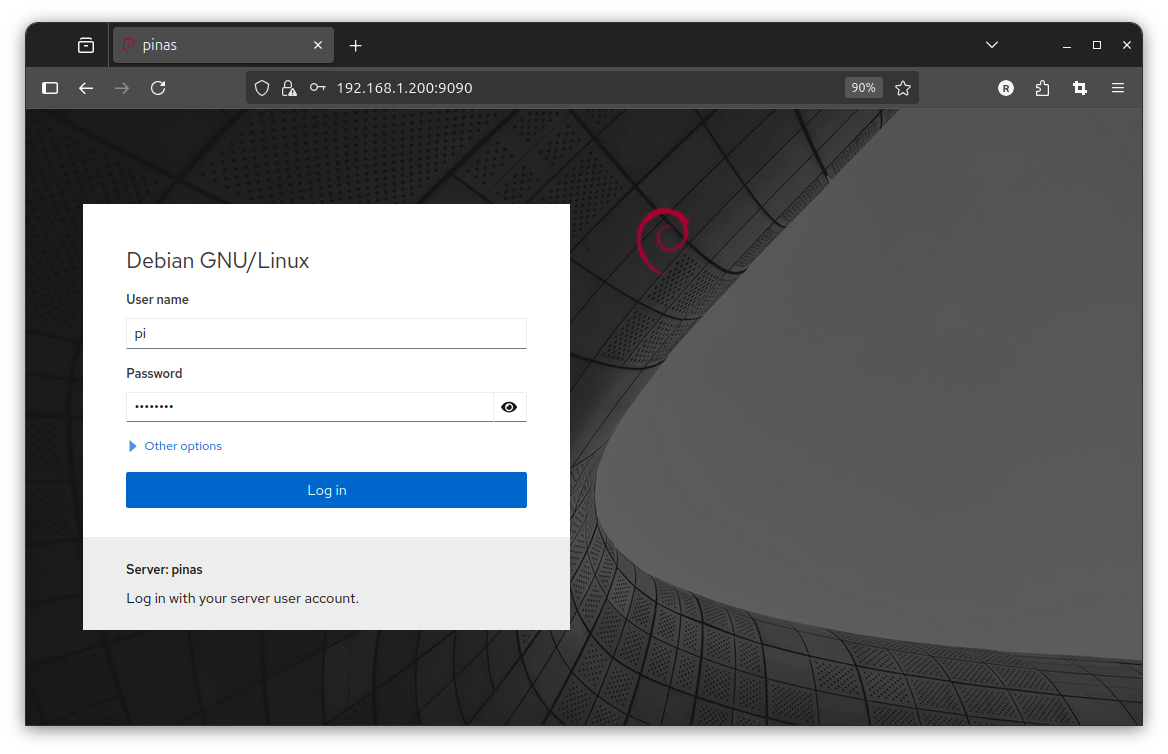
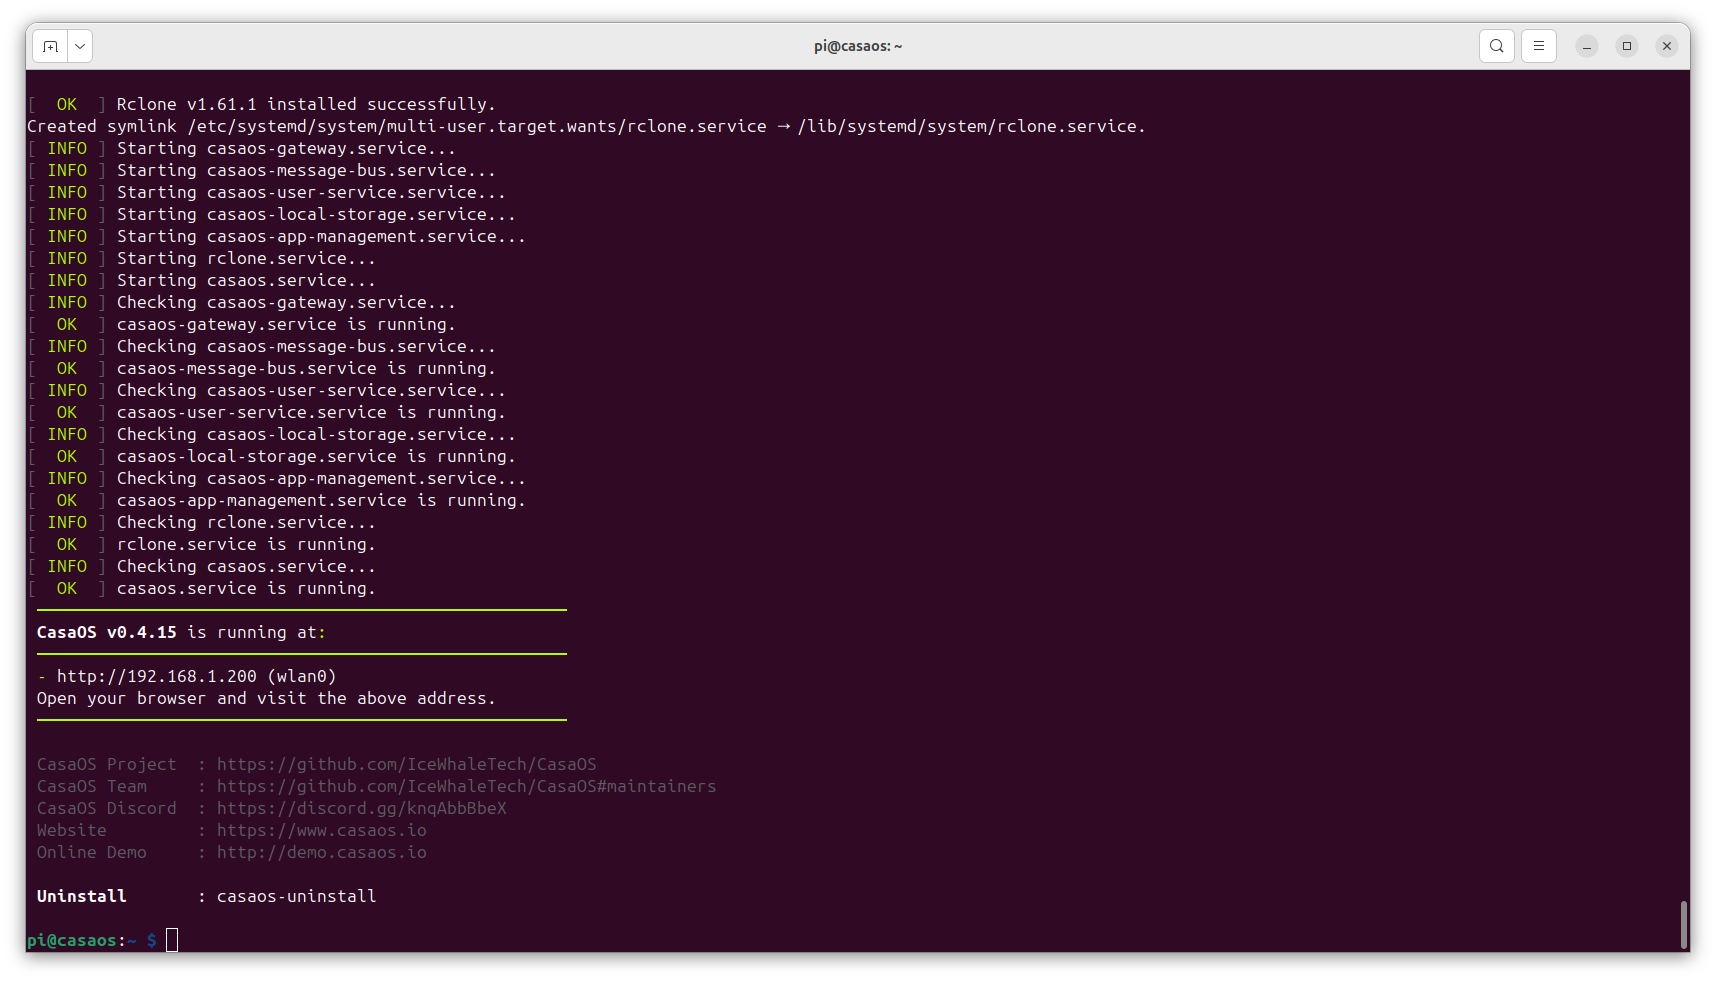
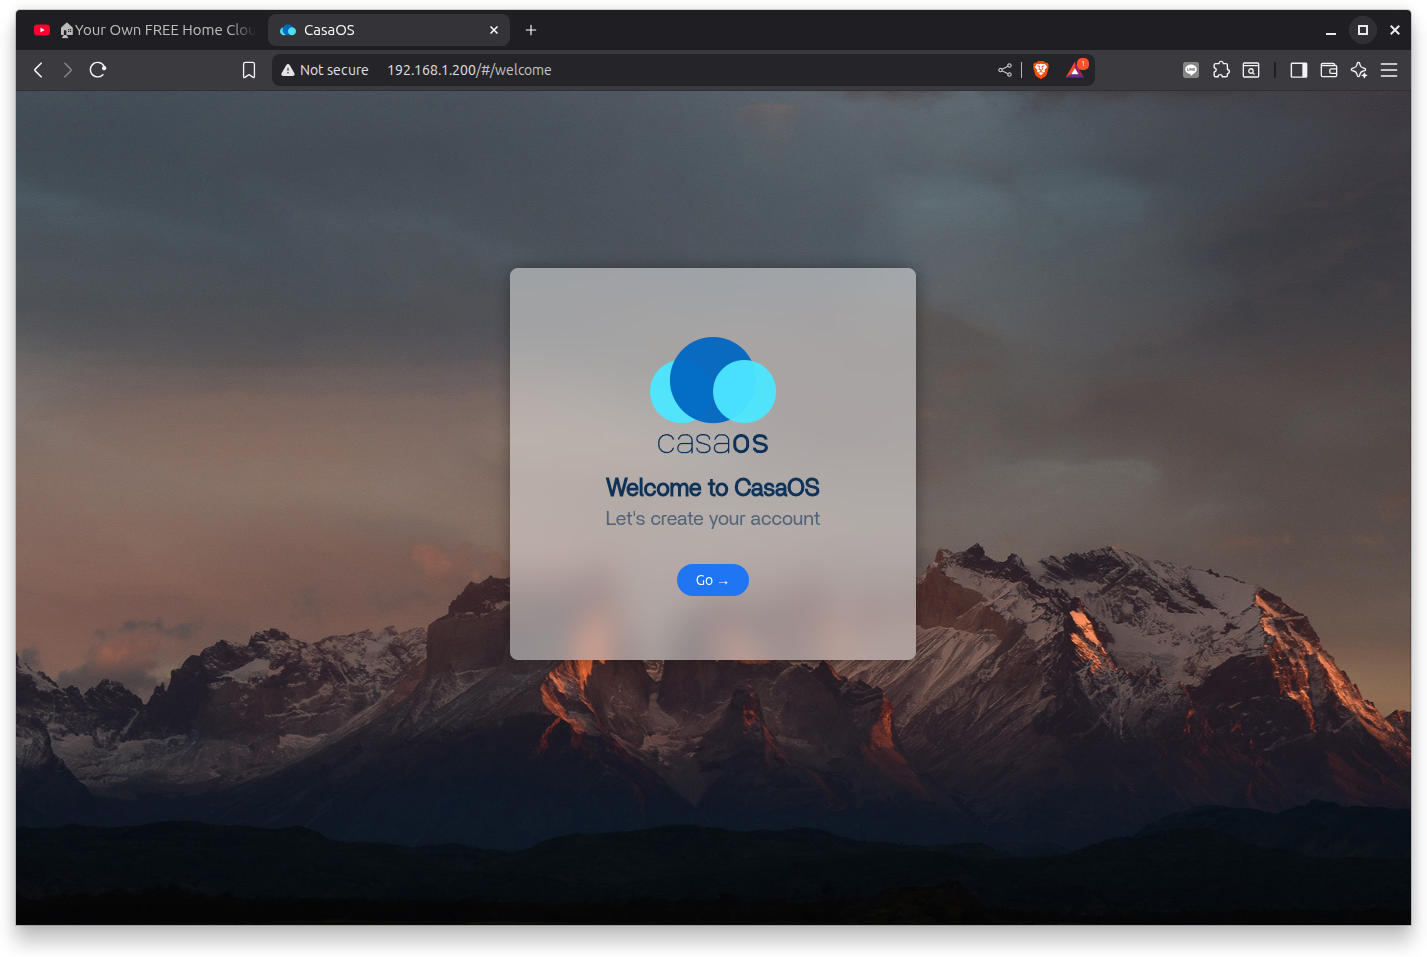
browser
http://192.168.1.200
or try .local
like here: casaos.local
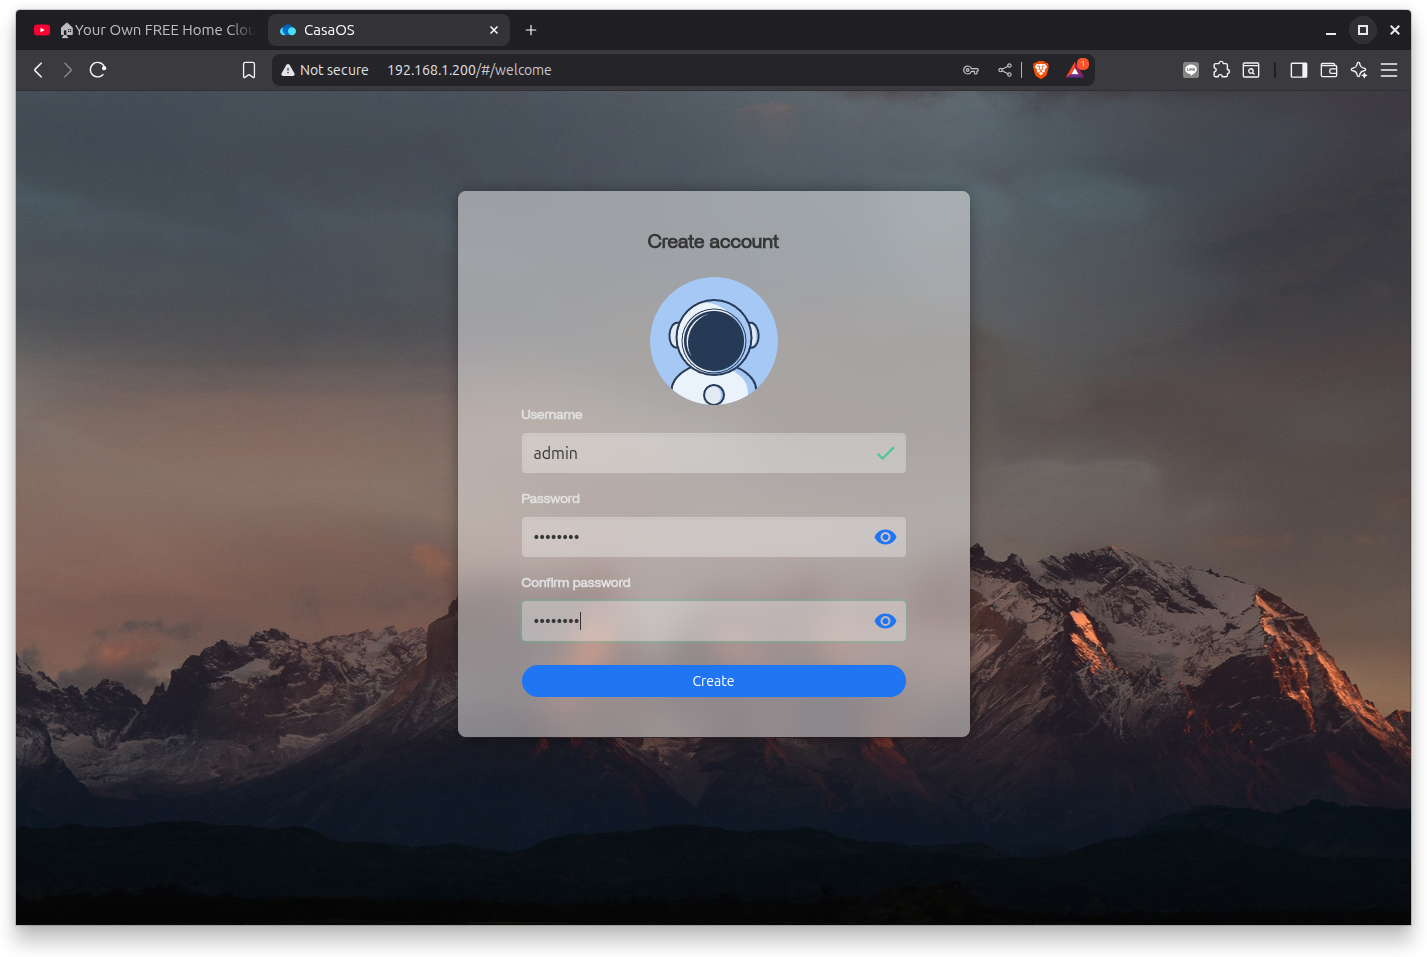
user: admin
password:
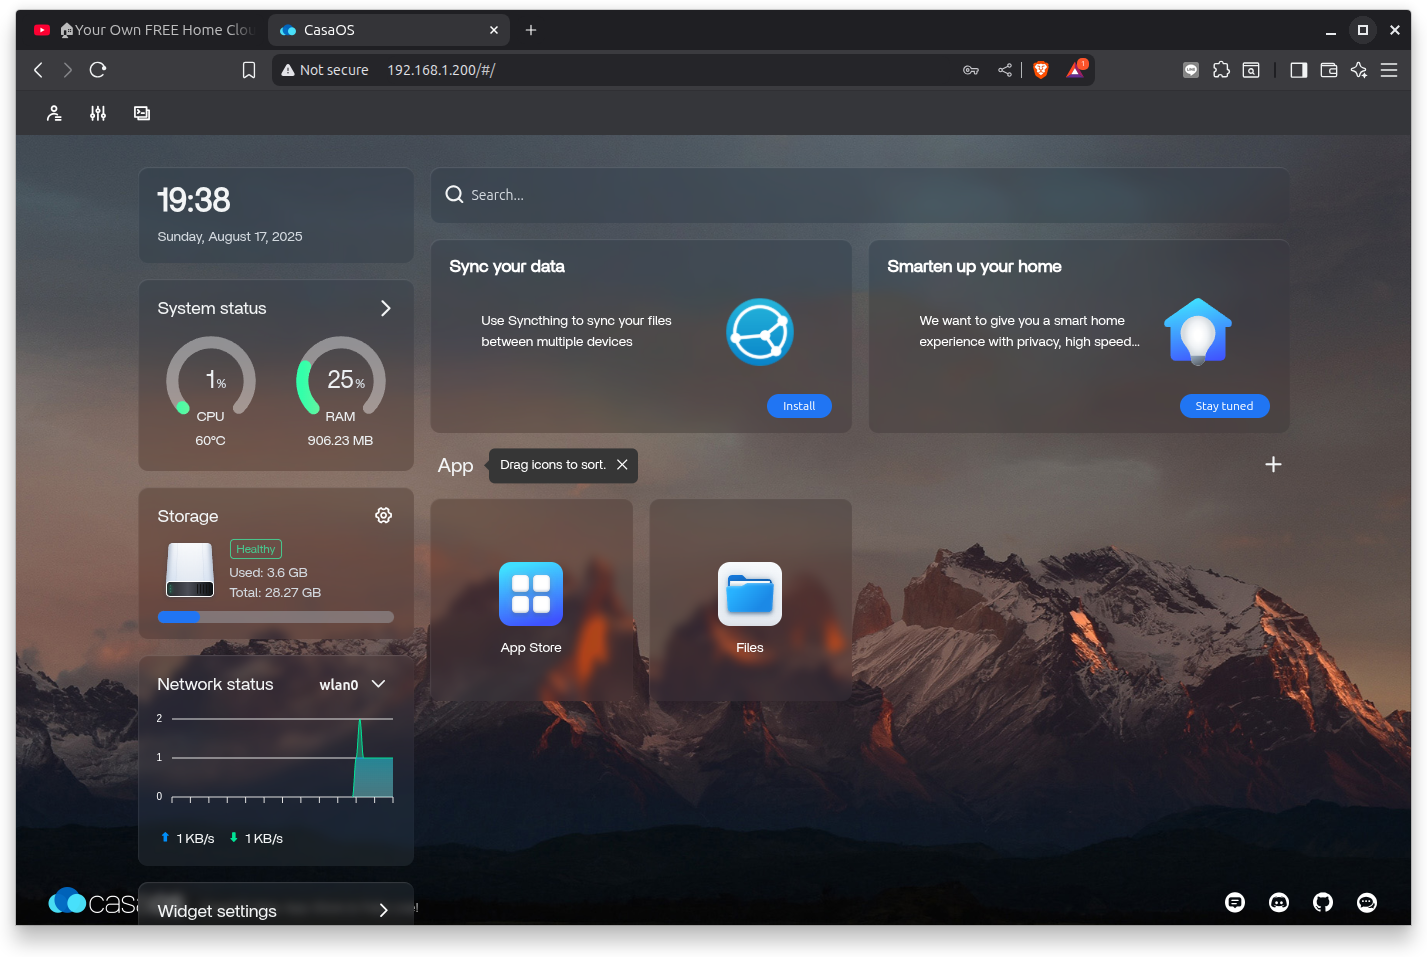
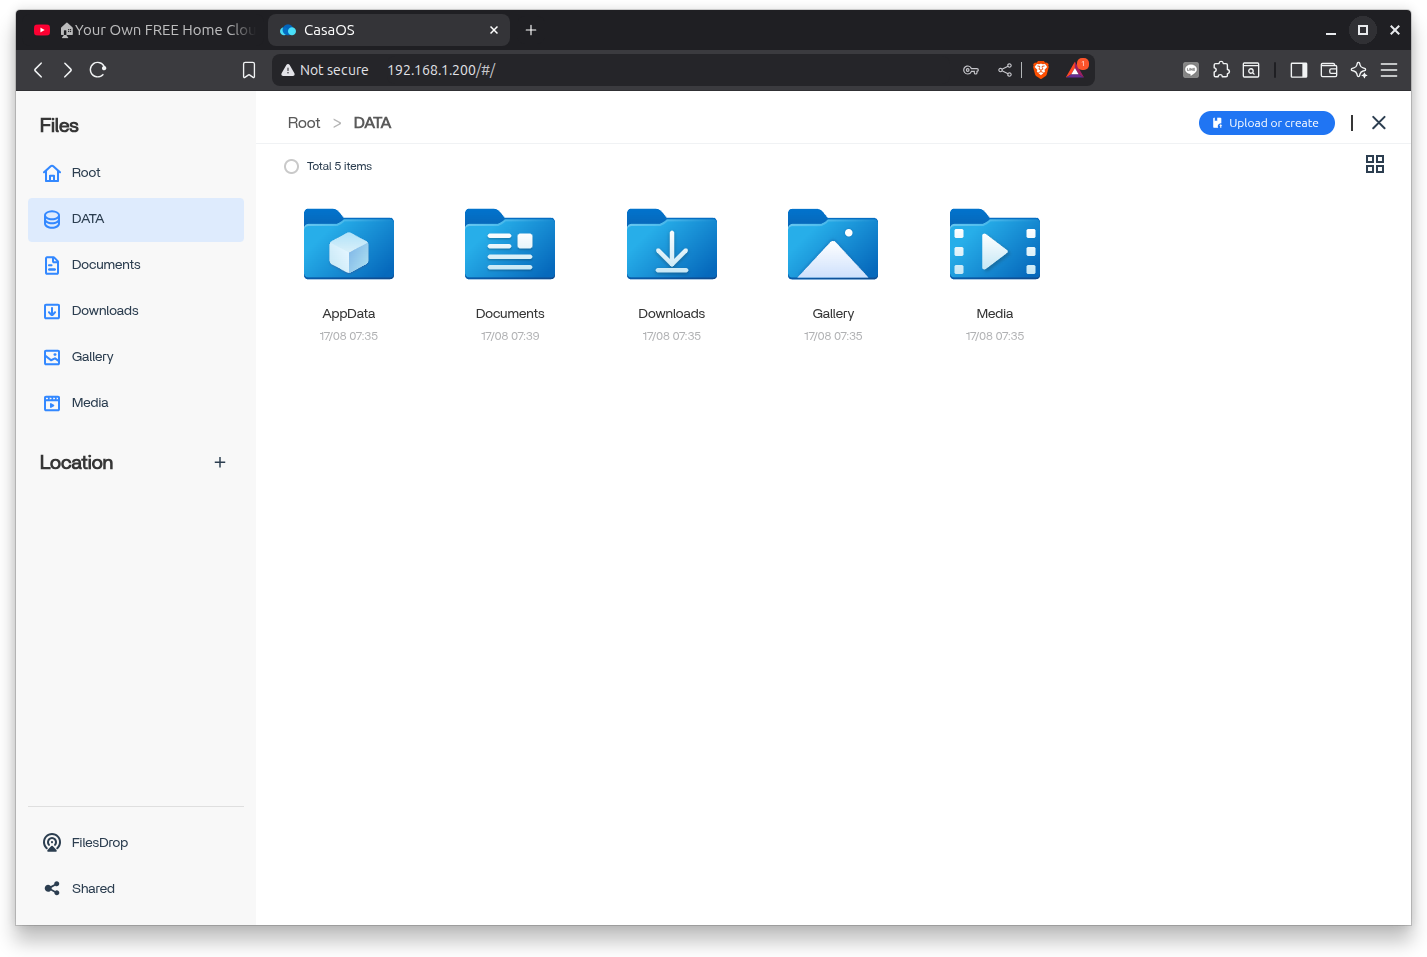
now that is just the home server shell:
pls. try the app.store and find lots of server tools to install:
+ home assist / esp Home
+ Jellyfin / Plex
+ nextcloud
+ Node-Red
+ portainer
+ pi hole
...
now i wanty to recheck on something i try years ago..
you see, a big thing about a 'headless' RPI setup is to
find the IP of it after first boot ( to SSH into it )
now i go back up where i burn that uSD for CASA OS with RASPIOS Lite
and do it again
-1- Raspberry Pi Imager
+ RPI3
+ Raspberry Pi OS Lite (64bit)
+ uSD 32GB
+ NEXT / Edit Settings +
+ + enable SSH, user password, WiFi settings ( country / SSID + password )
* NOW remount uSD ( out / in )
and see filemanager drive ( here on RPI4: /media/pi/bootfs )
open cmdline.txt (what has ONE long LINE only )
and add in it ip=192.168.1.103
( check have [space] before and after )
after boot it in RPI3
will find it with ssh pi@192.168.1.103
pw
and can easy undo that ! file is moved to! sudo nano /boot/firmware/cmdline.txt
and give fix IP like you did above
and other setup thing is possibly to follow me about my .bash_aliases
or wget https://engineering-news.org/kllfusion01/downloads/RPI3_CASAOS_bash_aliases.txt
must rename to .bash_aliases
thanks for reading! back to OVERVIEW
or take a look at a different Raspberry Pi setup using PINN
on a bigger uSD having 2 different OS and a data-partition