RPI: make a desktop GUI app ( QT6 C++ / Py )
Posted by kll on February 11 2026 09:57:20
while RPI is known for learn Linux and start coding
from the beginning that real
desktop app programming / GUI
comes short or, for more easy start, begins with 'PyGame' ...
and i was in exact same situation a decade ago...
in the meantime i try to stay up to date
learn / teach
* web development
* micro controller ( add web server and data handling like mqtt )
and actually lost track on what had happened on the real app development front..
but sure noticed that some things have changed
like now for RPI OS 64bit on my RPI4 use
* OS: Debian GNU/Linux 13 (trixie) aarch64
* Kernel: Linux 6.12.62+rpt-rpi-v8
* WM: labwc (Wayland)
* Theme: gtk2 [Qt]
RPI OS Linux? support default QT5? or even QT6?
Extended Blog
IDE
C++
hello_world.cpp
QT6 qtceator with C++
qtstart ( again)
Summary
start from desktop
Qt6 & Python
Example App Python3 QT6 PySide6
Docker Dev Environment
IDE
( Integrated Development Environment )
default RPI desktop OS has preinstalled GEANY IDE
if insist to use VS Code there are 2 ways:
* install on RPI ( 4 or 5 )
sudo apt install code
* install on PC and via SSH develop ON RPI
from terminal start in your code directory with
code .
alternative can use Codium ( a version without the MS tracking )
via the PI APP tool
wget -qO- https://raw.githubusercontent.com/Botspot/pi-apps/master/install | bash
pls add C++ extension
later we see that QT Creator is also a IDE
and with its integrated QT Designer it is all you need to make your first GUI Qt6 app.
C++
one of the programming languages used to make APP's is C++
C++ intro
or just
cppreference
sudo apt install build-essential gdb
( here already installed )
hello_world.cpp
mkdir ~/Projects/CPP
mkdir ~/Projects/CPP/HelloWorld
cd ~/Projects/CPP/HelloWorld
nano hello_world.cpp
with:
#include <iostream>
using namespace std;

int main() {
 cout << "Hello World!";
 return 0;
}
nano makefile ( make sure to use [tab] and not [ ][ ][ ] )
CXX = g++ # ___________________________________________ Define the C++ compiler to use (g++)
SRC = hello_world.cpp # _______________________________ Define the main source
TARGET = hello_world # ________________________________ Define the name of the output executable

all: $(TARGET) # ______________________________________ The 'all' target is the default when you run 'make'

$(TARGET): $(SRC) # ___________________________________ Rule to build the executable from source file
   @echo "Starting build..."
   $(CXX) $(SRC) -o $(TARGET)
   @echo "Run with ./"$(TARGET)
   @echo "to force rebuild use: make -B"

clean: # ______________________________________________ A common target to clean up generated files
   rm -f $(TARGET) *.o
make
g++ hello_world.cpp -o hello
./hello_world
Hello World!
you need to know above steps,
but you not need to work that way..
remember above installed
VS Code
we try that now
still in terminal of RPI desktop OS (here via VNC )
cd ~/Projects/CPP/HelloWorld
code .
and get a VS CODE desktop window started ( in that directory! see [File][open] skipping the [Project] step):
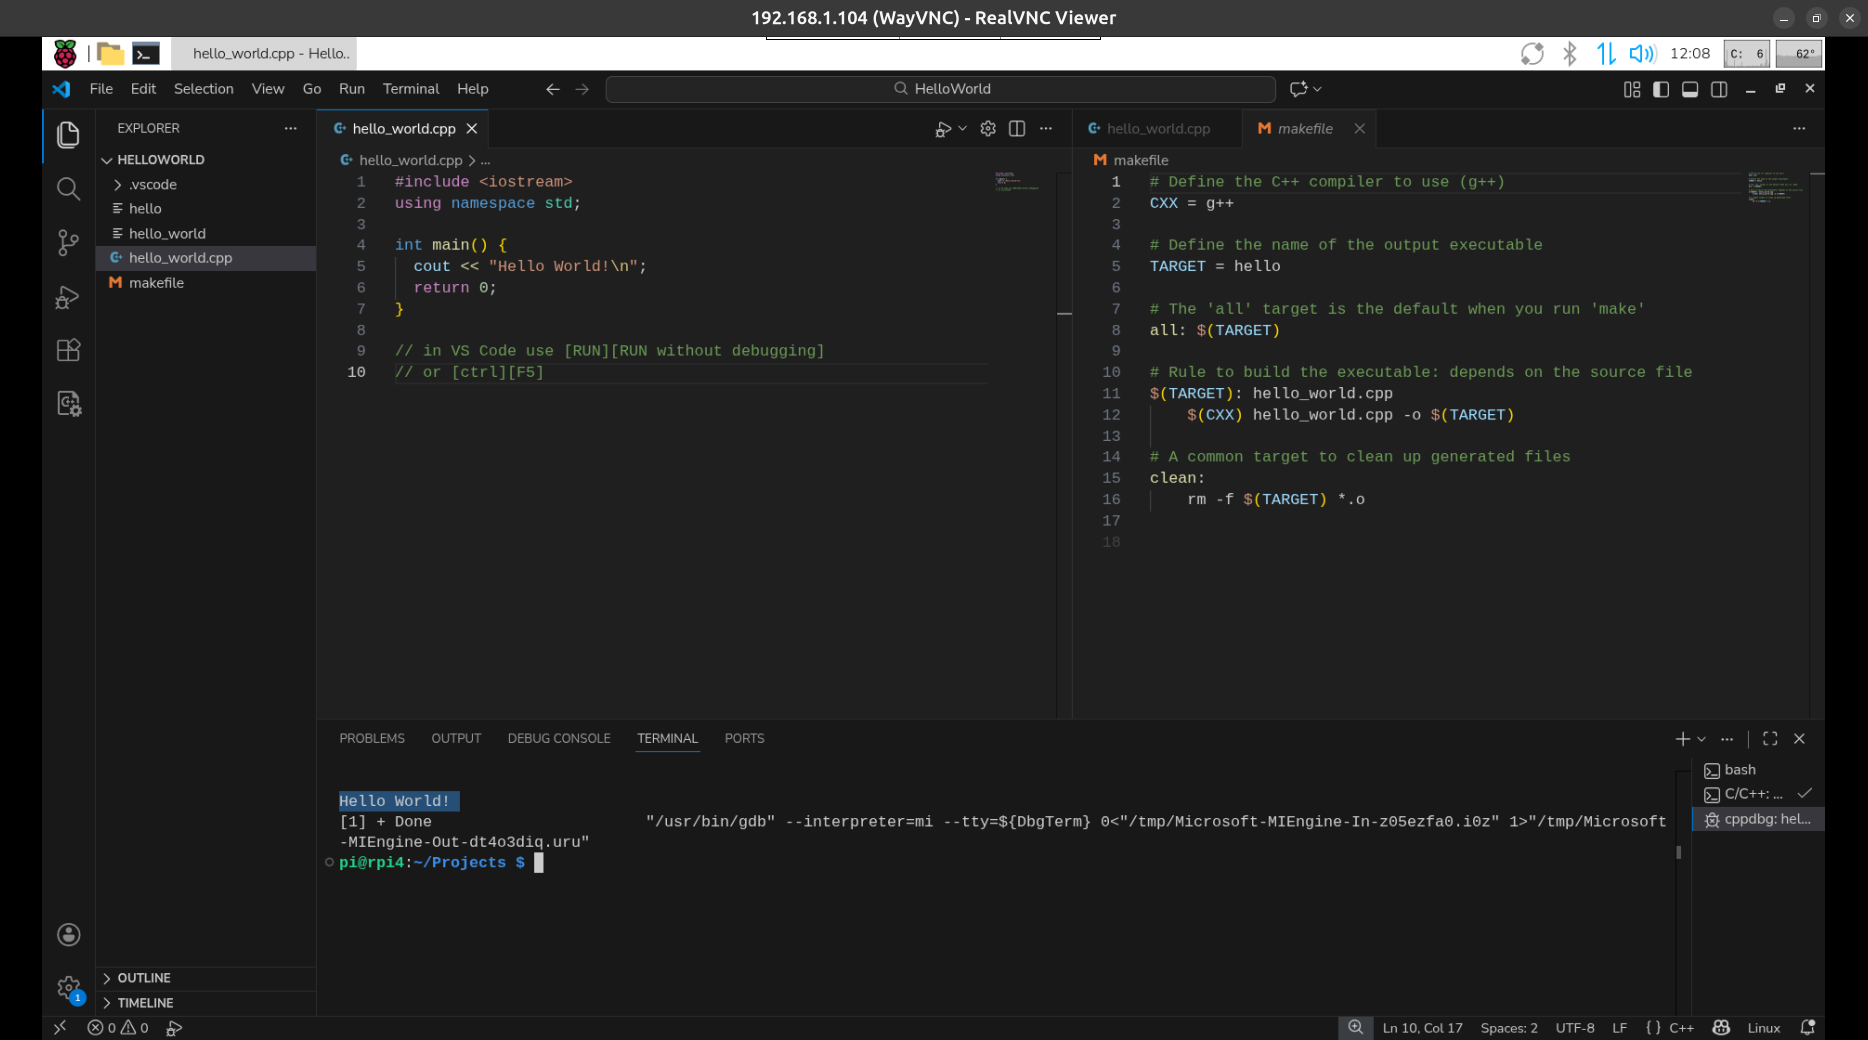
easy edit files, compile & run from one desktop window
click here for old / failed LOG
but to code a desktop app // opening a window in desktop and use keyboard and mouse in it
is much more difficult than that 'hello_world' terminal app
QT
try QT 5 first:
sudo apt install qttools5-dev-tools
sudo apt install qtcreator
( where QT Creator itself is QT6 already )
Go to menu help > about plugins
Uncheck device support > remote linux
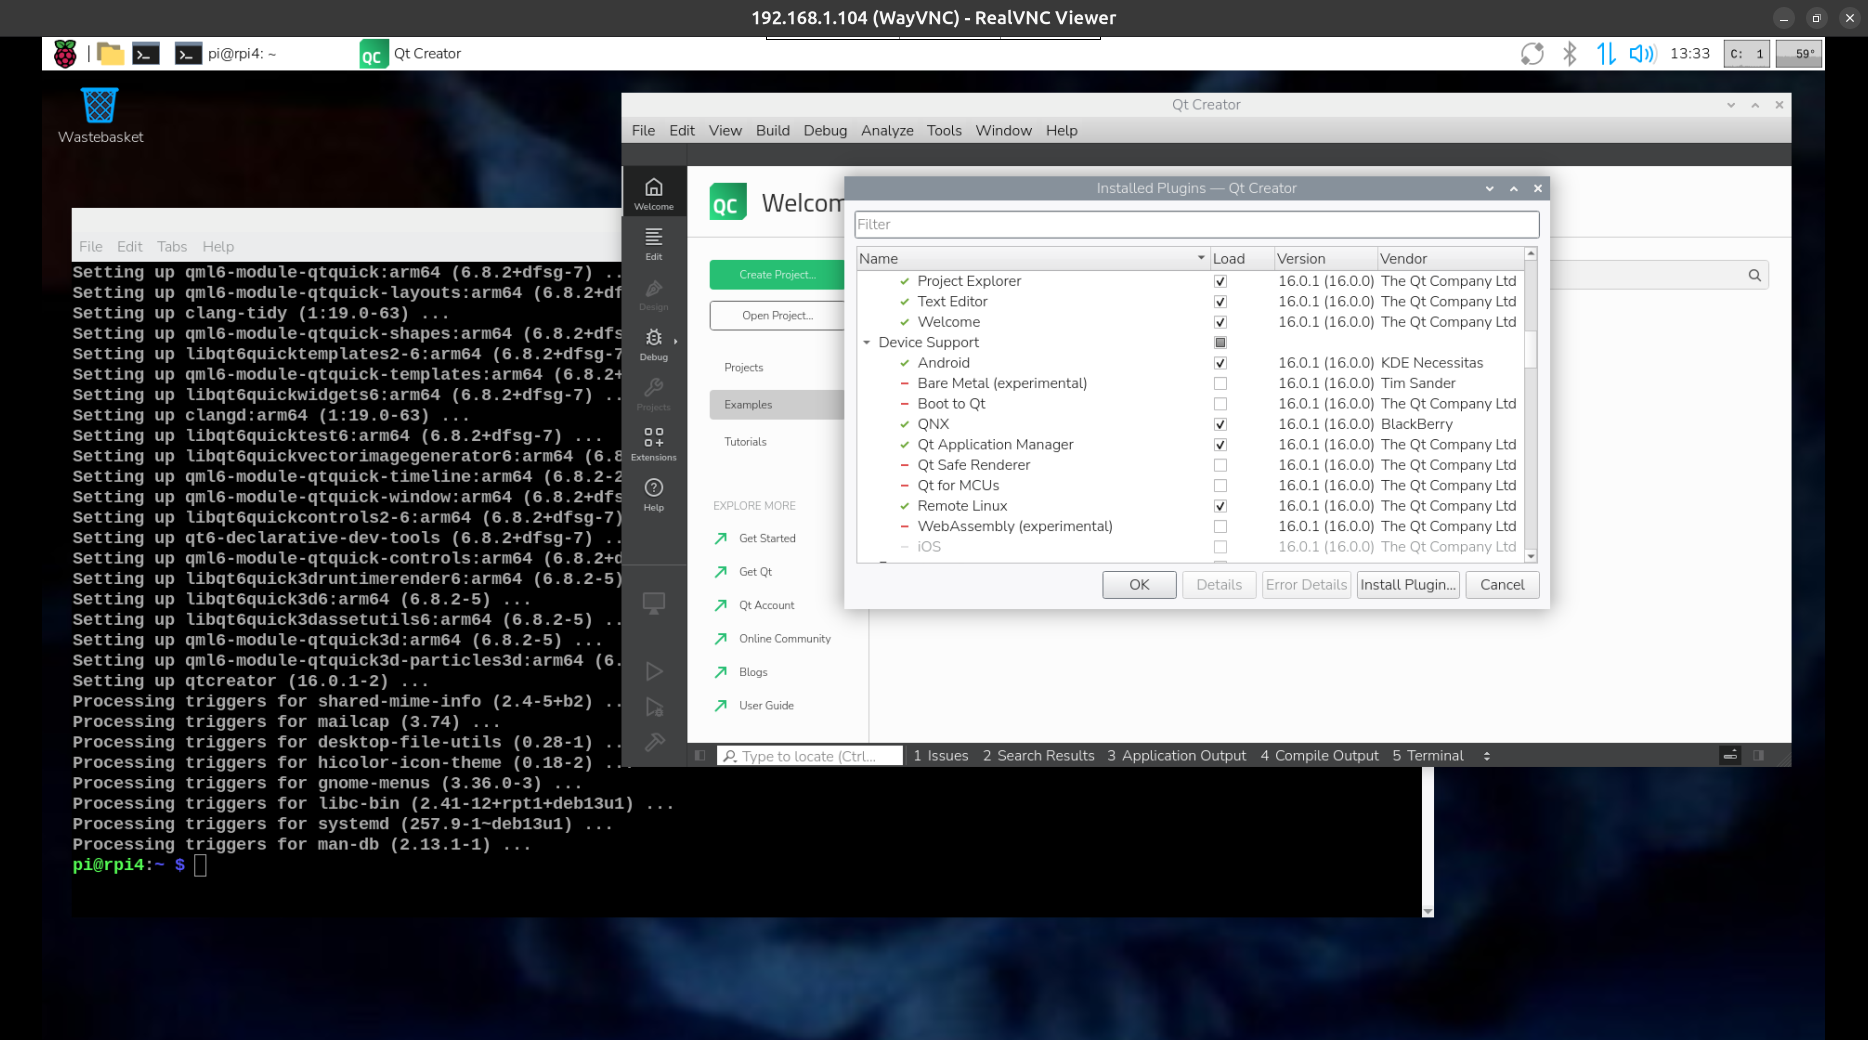
Restart Qt Creator
possibly needed??
sudo apt install qtdeclarative5-dev
sudo apt install xterm
sudo apt install git-core
sudo apt install subversion
Creating your first project in Qt Creator is
a straightforward process guided by wizards. You can choose between different application types, such as Qt Widgets (for traditional desktop UIs) or Qt Quick (for dynamic, modern UIs using QML), and languages like C++ or Python.
Steps to Create a New Qt Project
Open Qt Creator and go to the Welcome page.
Select Projects from the left pane, and then click New Project. This will open the New Project dialog.
Choose a project template. For a general-purpose C++ desktop application, select Application (Qt) > Qt Widgets Application > Choose.
Name your project and choose a location on your computer to store the project files. It's recommended to keep all projects in a central workspace. Then, click Next or Continue.
Configure project details (this step may vary depending on the template chosen). For a Qt Widgets application, you might define class information (e.g., MainWindow as class name, QMainWindow as base class).
Select the build system. You can typically choose between CMake, qmake, or Qbs. If you are new to Qt, the default option (often CMake) is usually fine.
Select the kits you want to use. A "kit" defines the build environment, including the compiler, Qt version, and device type (e.g., desktop, Android, etc.). Most likely, you will only have one desktop kit available, which you should select.
Review the project settings and click Finish (or Done on macOS) to create the project files.
Build and Run Your Project
Once the project is created, Qt Creator will generate the necessary initial files (like a main file, project file, and UI file).
To run your application, simply press the green Run button (usually a green play icon) in the bottom-left corner of the interface or go to Build > Run in the menu.
The application will compile and then launch, displaying an empty window based on the template you selected.
For detailed tutorials and official documentation, you can visit the Qt Documentation website.
first make a new project directory
mkdir ~/Projects/CPP/Qt_start
cd ~/Projects/CPP/Qt_start
start Qt creator
[ Create Project ] [Application (Qt) ] [ Qt Widgets Application ] [Choose]
name: QT_start
path: ~/Projects/CPP/Qt_start
[next]
CMake[next][next]
Kits ?problem?
[Edit][Preferences][Kit][Add] ( or better select 'Desktop' and [duplicate] rename to
Name: Qt_settings
[Apply]
still Kits ?problem?
missing qmake:
sudo apt install qt5-qmake
qmake --version
QMake version 3.1
Using Qt version 5.15.15 in /usr/lib/aarch64-linux-gnu
ok but not for:
sudo apt install qt6-qmake
Error: Unable to locate package qt6-qmake
but
sudo apt install qt6ct
qt6ct is already the newest version (0.10-2+b1).
( possibly by the QT creator installation )
found:
sudo apt install qt6-base-dev libvulkan-dev qmake6 qmake6-bin qt6-qpa-plugins
anyhow: still problems in Kit,
now missing cmake:
sudo apt install cmake cmake-doc cmake-format elpa-cmake-mode
kit: CMake Tool:
System CMake at /usr/bin/cmake (Default)
Generator Ninja
still / again problems in Kit:
QT version: QT 5.15.15 (qt5)
Error: QT version not properly installed
try back to use VS Code:
code .
from [Extensions] install
Qt Extension Pack
Qt C++
QT6 qtceator with C++
second setup:
OK, got help from FORUM
( Thanks AndyD ), so try again:
( yes, to verify installation try on a new setup: )
sudo apt install build-essential qtcreator qt6-base-dev
git clone https://github.com/AndrewFromMelbourne/qtsize.git
cd qtsize
mkdir build
cd build
cmake ..
make
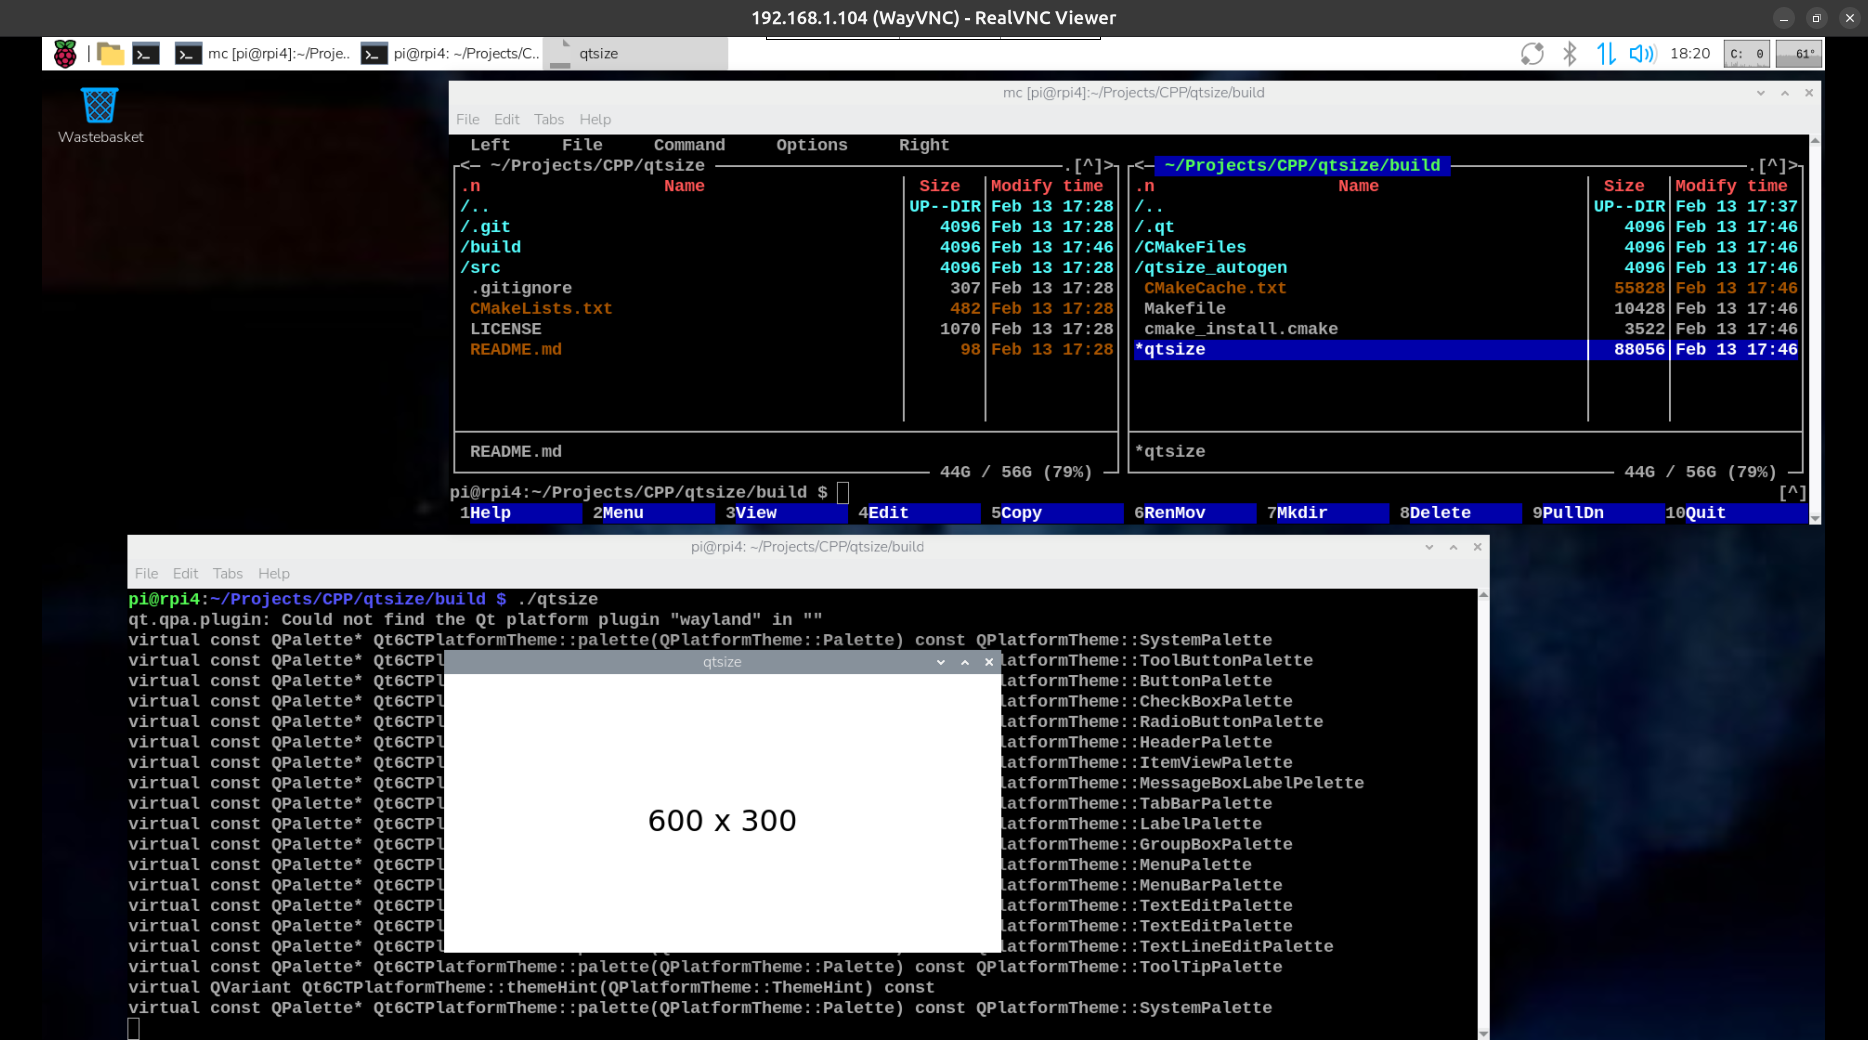
./qtsize
/qtsize/build $ cmake ..
bash: cmake: command not found
sudo apt install cmake cmake-doc cmake-format elpa-cmake-mode qt6-wayland
now works nice
still same old question: how edit that app window with qtcreator
start qtcreator from desktop menu
[File][File open]
.qtsize/CMakeList.txt
see some green bars ?build?
-a- try on the left the green arrow
and get the running app
-b- try
[Build]
under [Build Project "qtsize"]
select [Rebuild]
08:28:27: Starting: "/usr/bin/cmake" --build /home/pi/Projects/CPP/qtsize/build --target clean
08:28:28: The process "/usr/bin/cmake" exited normally.
08:28:28: Starting: "/usr/bin/cmake" --build /home/pi/Projects/CPP/qtsize/build --target all
[ 0%] Built target qtsize_autogen_timestamp_deps
[ 16%] Automatic MOC and UIC for target qtsize
[ 16%] Built target qtsize_autogen
[ 33%] Building CXX object CMakeFiles/qtsize.dir/qtsize_autogen/mocs_compilation.cpp.o
[ 50%] Building CXX object CMakeFiles/qtsize.dir/src/MainWindow.cxx.o
[ 66%] Building CXX object CMakeFiles/qtsize.dir/src/main.cxx.o
[ 83%] Linking CXX executable qtsize
[100%] Built target qtsize
08:28:50: The process "/usr/bin/cmake" exited normally.
08:28:50: Elapsed time: 00:23.
looks good
now
[Build][Run]
and get the running app
select in Projects / file / qtsize [main] / qtsize / Source Files / src / MainWindow.cxx
( can edit there in text editor )
but still not find where to edit the window design graphically?
( and AndyD informed that this app was created by texteditor ( but made me install qtcreator? for what?) )
qtstart ( again)
now in this second setup
with cmake and qtcreator installed
( and the git loaded example run )
i try a project creation again and this time:
[desktop menu] [qtcreator]
[create Project]
'qtstart' widget ... all defaults
press green arrow and compiles and runs ( get a empty app window )
now in the created files find:
Project qtstart
qtstart
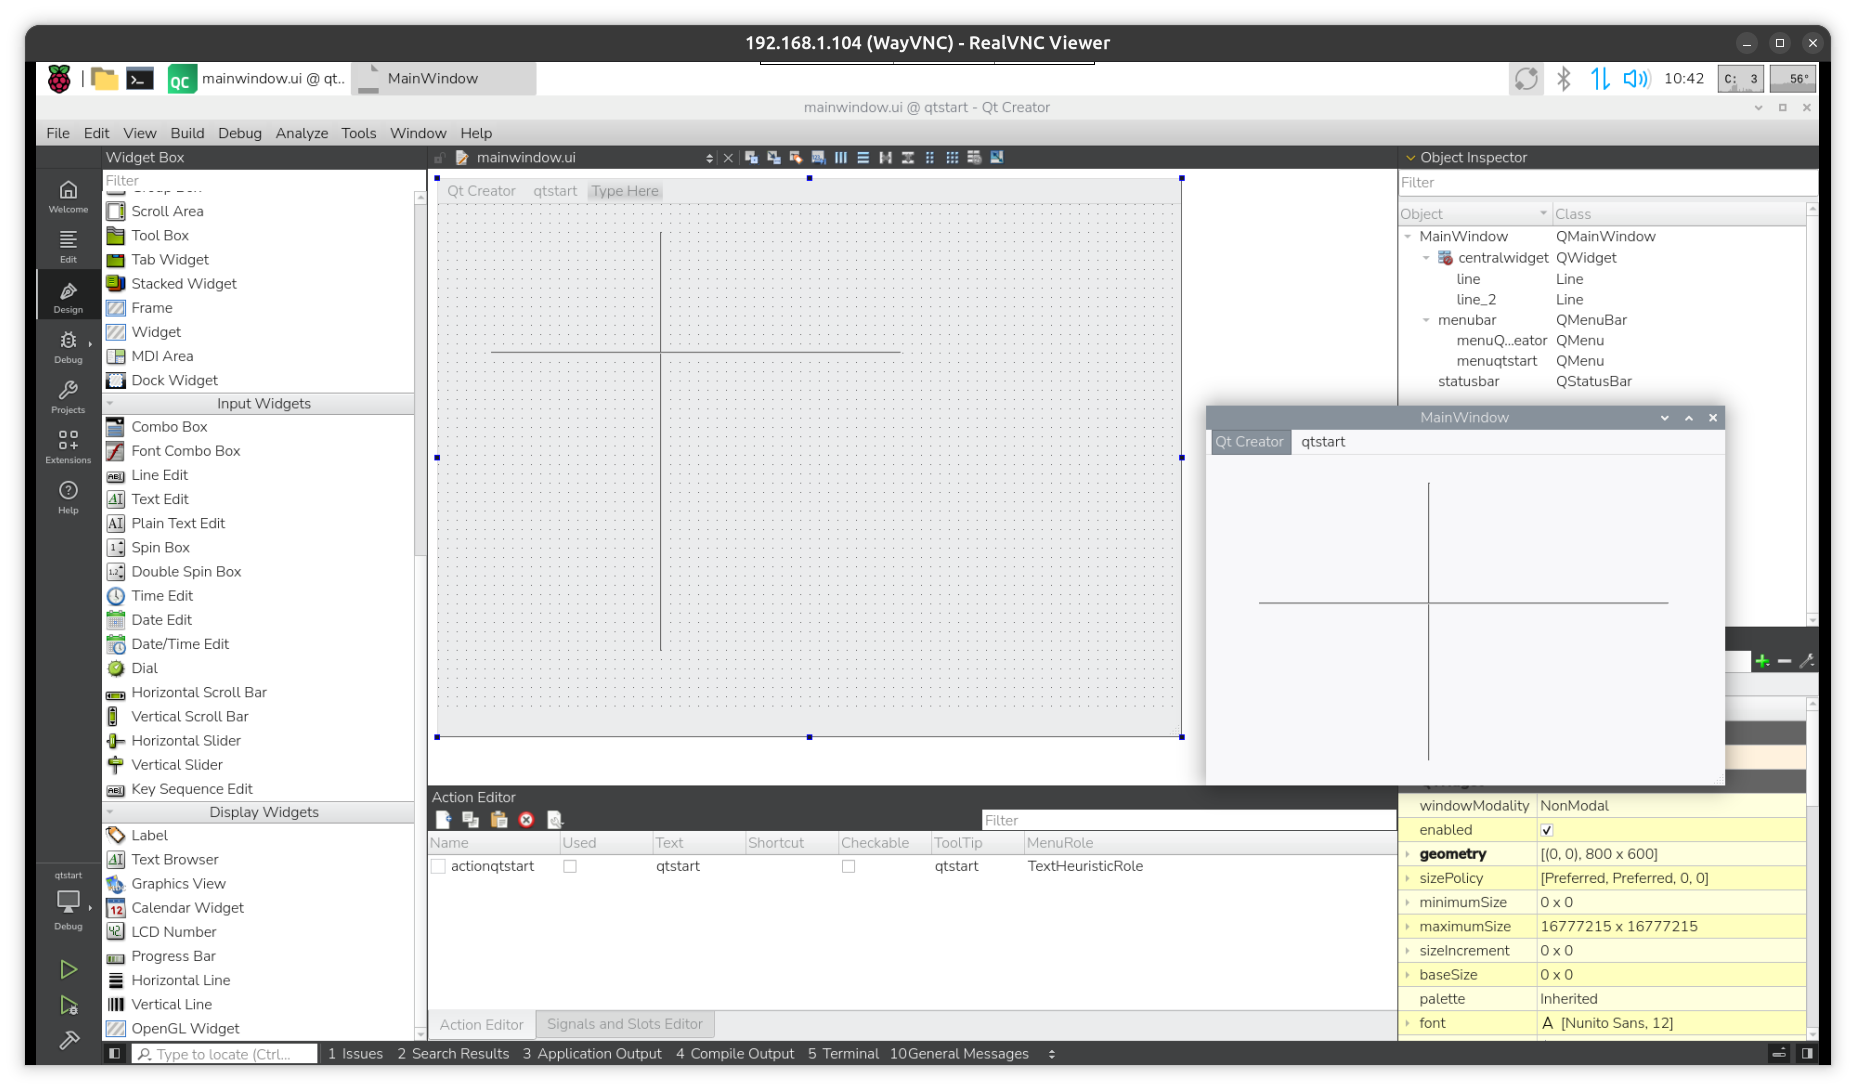
/Forms/mainwindow.ui [double click]
and you are in the Design mode
+ i added as test
+ + 2 top texts
+ + 2 lines
[file edit]mode
press green arrow
and see the updated window
Summary
RPIOS desktop 64bit comes preinstalled with:
g++
gcc version 14.2.0 (Debian 14.2.0-19)
make
GNU Make 4.4.1
so with 2 project files
makefile ( must use [tab] instead spaces [ ][ ][ ] )
hello_world.cpp
and the command
make
g++ hello_world.cpp -o hello_world
can make a C++ terminal app ( without any installation )
and to run it by call the created target:
./hello_world
for GUI app ( Qt6 C++ ) and
if have external source code example ( like above AndyD: qtsize )
need:
sudo apt install cmake qt6-base-dev qt6-wayland
cmake ..
make
./qtsize
but sure you want design your own app like with:
sudo apt install qtcreator
( better restart )
[menu] [Programming] [QT Creator]
[Create Project] [Application (Qt)] [Qt Widgets Application] [Choose]
Location: 'qtstart' /home/pi/Projects/CPP [default yes] [Next]
[Next][Next][Next][Next][Next][Finish]
[build][Run]
now try
[Forms] [mainwindow.ui] double click to open in Design Mode
start from desktop
first for test ( to check about dependencies / requirements )
i copy the executable from
~/Projects/CPP/qtstart/build/Desktop-Debug/qtstart
and start
~/Projects/CPP/teststart $ ./qtstart
OK
as that is a desktop app i want to start it ? from a icon?
so i try a
nano qtstart.desktop
[Desktop Entry]
Name=qtstart
Comment=Run My first C++ Qt Desktop Application
Exec=/home/pi/Projects/CPP/teststart/qtstart
Icon=/path/to/icon.png
Terminal=false
Type=Application
Categories=Utility;
make it executable.. but it will still ask if you want to start it...
chmod +x qtstart.desktop
as that works i can copy that file to the desktop.
* if need it open as default app can copy it to
/home/pi/.config/autostart/qtstart.desktop
when try
qtcreator [Create Project] [Application (Qt)] [Qt Quick Application] 'qtquick' ...
have error
CMakeLists.txt
find_package(Qt6 REQUIRED COMPONENTS Quick)
but
sudo apt install qt6-quick
Error: Unable to locate package qt6-quick
sudo apt install qt6-declarative-dev
while now still get 4 warnings it works..
Qt6 & Python
( and using later PySide6 only, ignoring PyQt, Kivy, Tkinter, PySimpleGUI, WxPython )
from:
qtforpython-6
required is python 3.8, here on latest RPIOS ( 2/2026 ) have
python -V
Python 3.13.5
mkdir /home/pi/Projects/PY/
cd /home/pi/Projects/PY/
python -m venv venv
source venv/bin/activate
(venv)$ python -m pip install PiSide6
see: Successfully installed PySide6-6.10.2 PySide6_Addons-6.10.2 PySide6_Essentials-6.10.2 shiboken6-6.10.2
check if can import:
(venv)$ python
>> import PySide6
[ctrl][d]
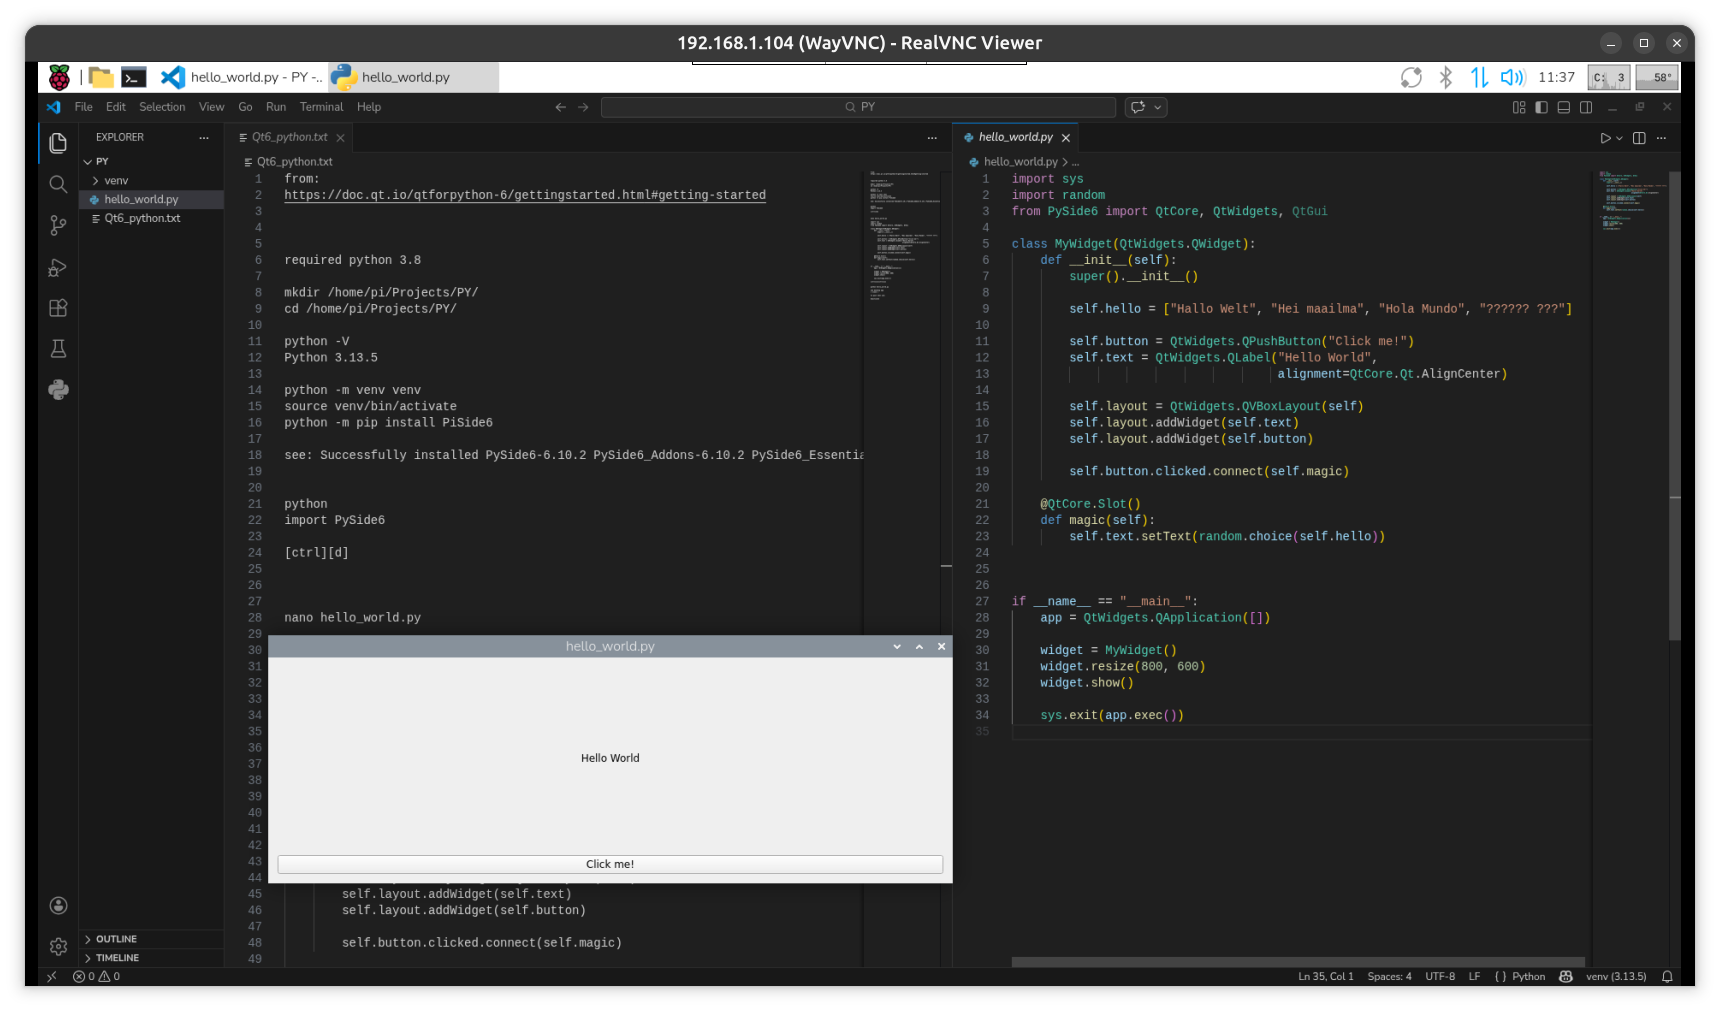
nano hello_world.py
pls. note again that python must use proper [tab]
i can not show here, sorry, better see linked tutorial
import sys
import random
from PySide6 import QtCore, QtWidgets, QtGui

class MyWidget(QtWidgets.QWidget):
 def __init__(self):
 super().__init__()

 self.hello = ["Hallo Welt", "Hei maailma", "Hola Mundo", "?????? ???"]

 self.button = QtWidgets.QPushButton("Click me!")
 self.text = QtWidgets.QLabel("Hello World",
 alignment=QtCore.Qt.AlignCenter)

 self.layout = QtWidgets.QVBoxLayout(self)
 self.layout.addWidget(self.text)
 self.layout.addWidget(self.button)

 self.button.clicked.connect(self.magic)

 @QtCore.Slot()
 def magic(self):
 self.text.setText(random.choice(self.hello))


if __name__ == "__main__":
 app = QtWidgets.QApplication([])

 widget = MyWidget()
 widget.resize(800, 600)
 widget.show()

 sys.exit(app.exec())
[ctrl][s][ctrl][x]
(venv)$ python hello_world.py
see desktop app
( close )
to quit venv use:
(venv)$ deactivate
try from VS Code
with install python defaults ( incl environment ) and
Qt for Python
but it took long time for it to find that existing venv
i read that Qt Creator and Designer can be used for this too, but no idea how, but try that too?
-1- QT Creator as IDE
youtube: create simple Qt Widgets application and run it in Qt Creator using PySide6
-2- Qt Designer
youtube: basics of PySide6 and Qt Designer
( 1.5h Tutorial )
good about designer, confusing because using PYCHARM
both bad as even in youtube fullscreen mode, texts are unreadable on my screen
so try it ( from desktop / here VNC ):
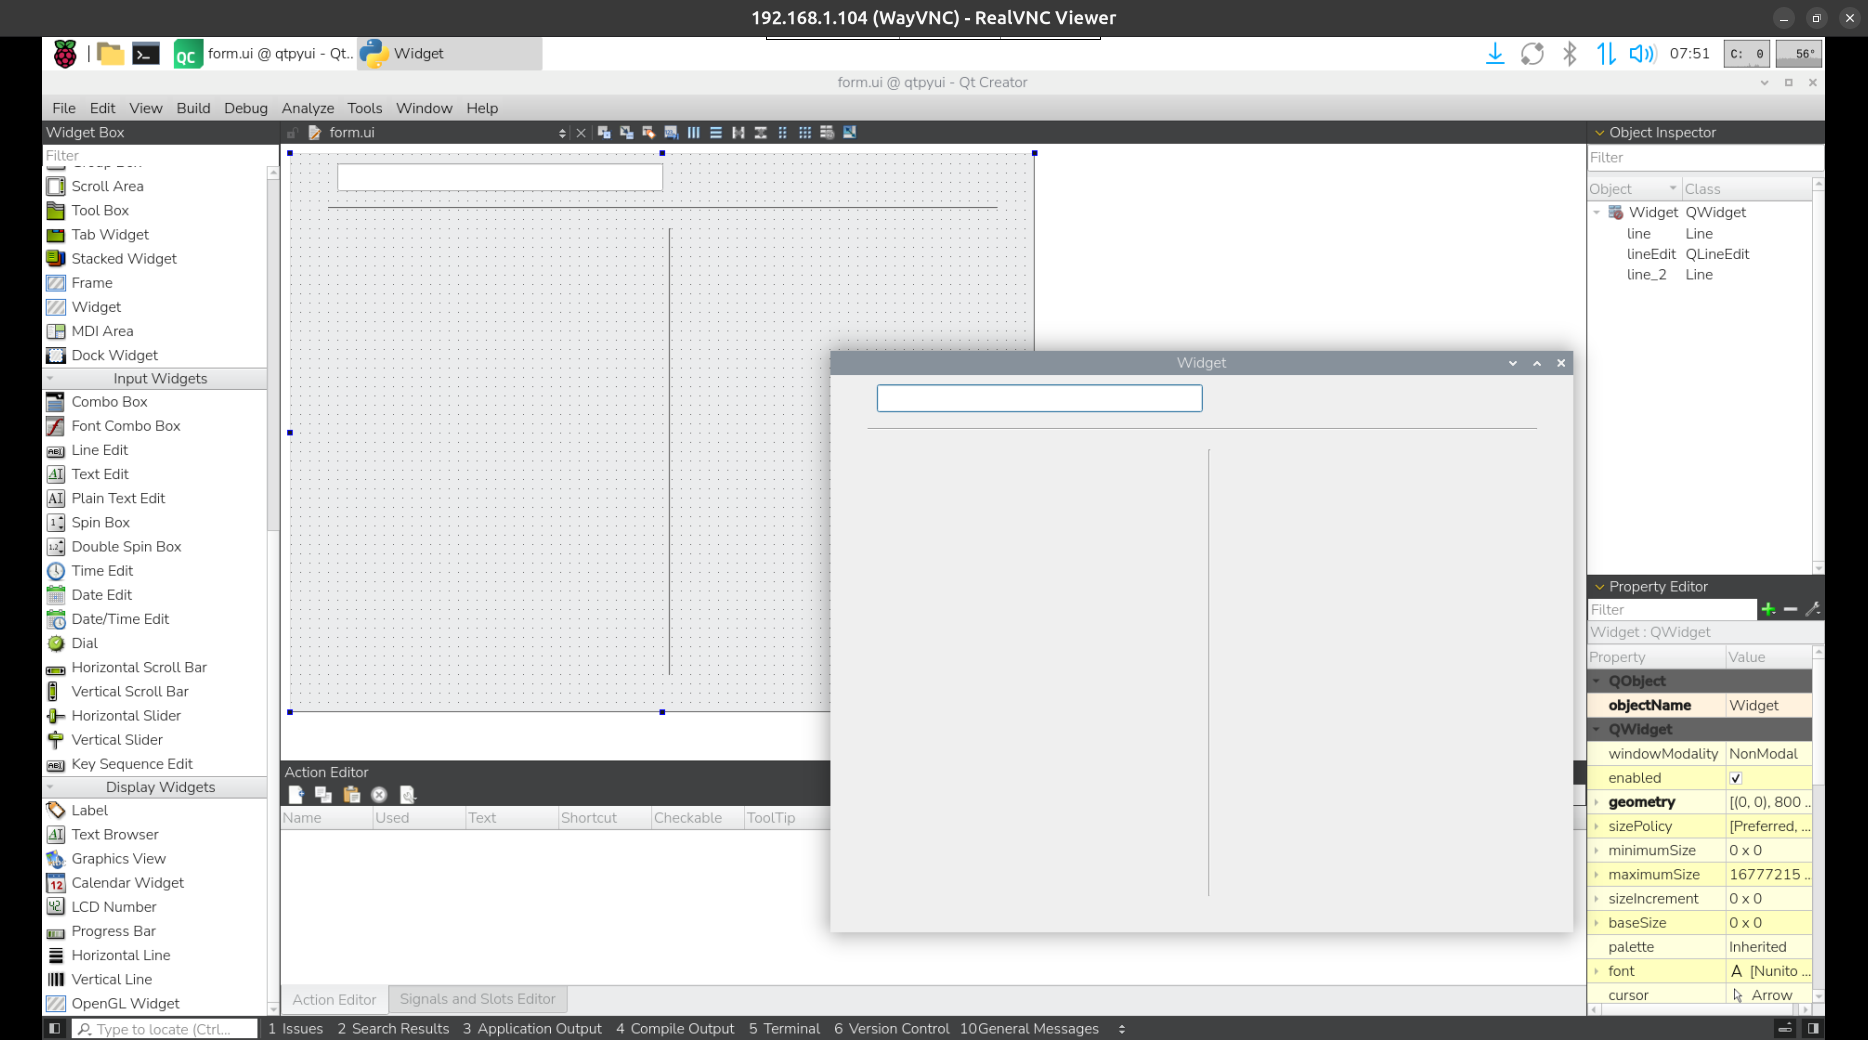
[menu] [Programming] [QT Creator]
[Create Project] [Application (Qt for Python)] [Window UI] [Choose]
Location: 'qtpyui' /home/pi/Projects/PY [default yes] [Next]
[Next][Next][Next][Finish]
get :
qtpyui/.qtcreator ( what is its own venv )
qtpyui/form.ui GUI design source / edit with double click Qt Designer
qtpyui/qtpyui.pyproject
qtpyui/qtpyui.pyproject.user
qtpyui/requirements.txt
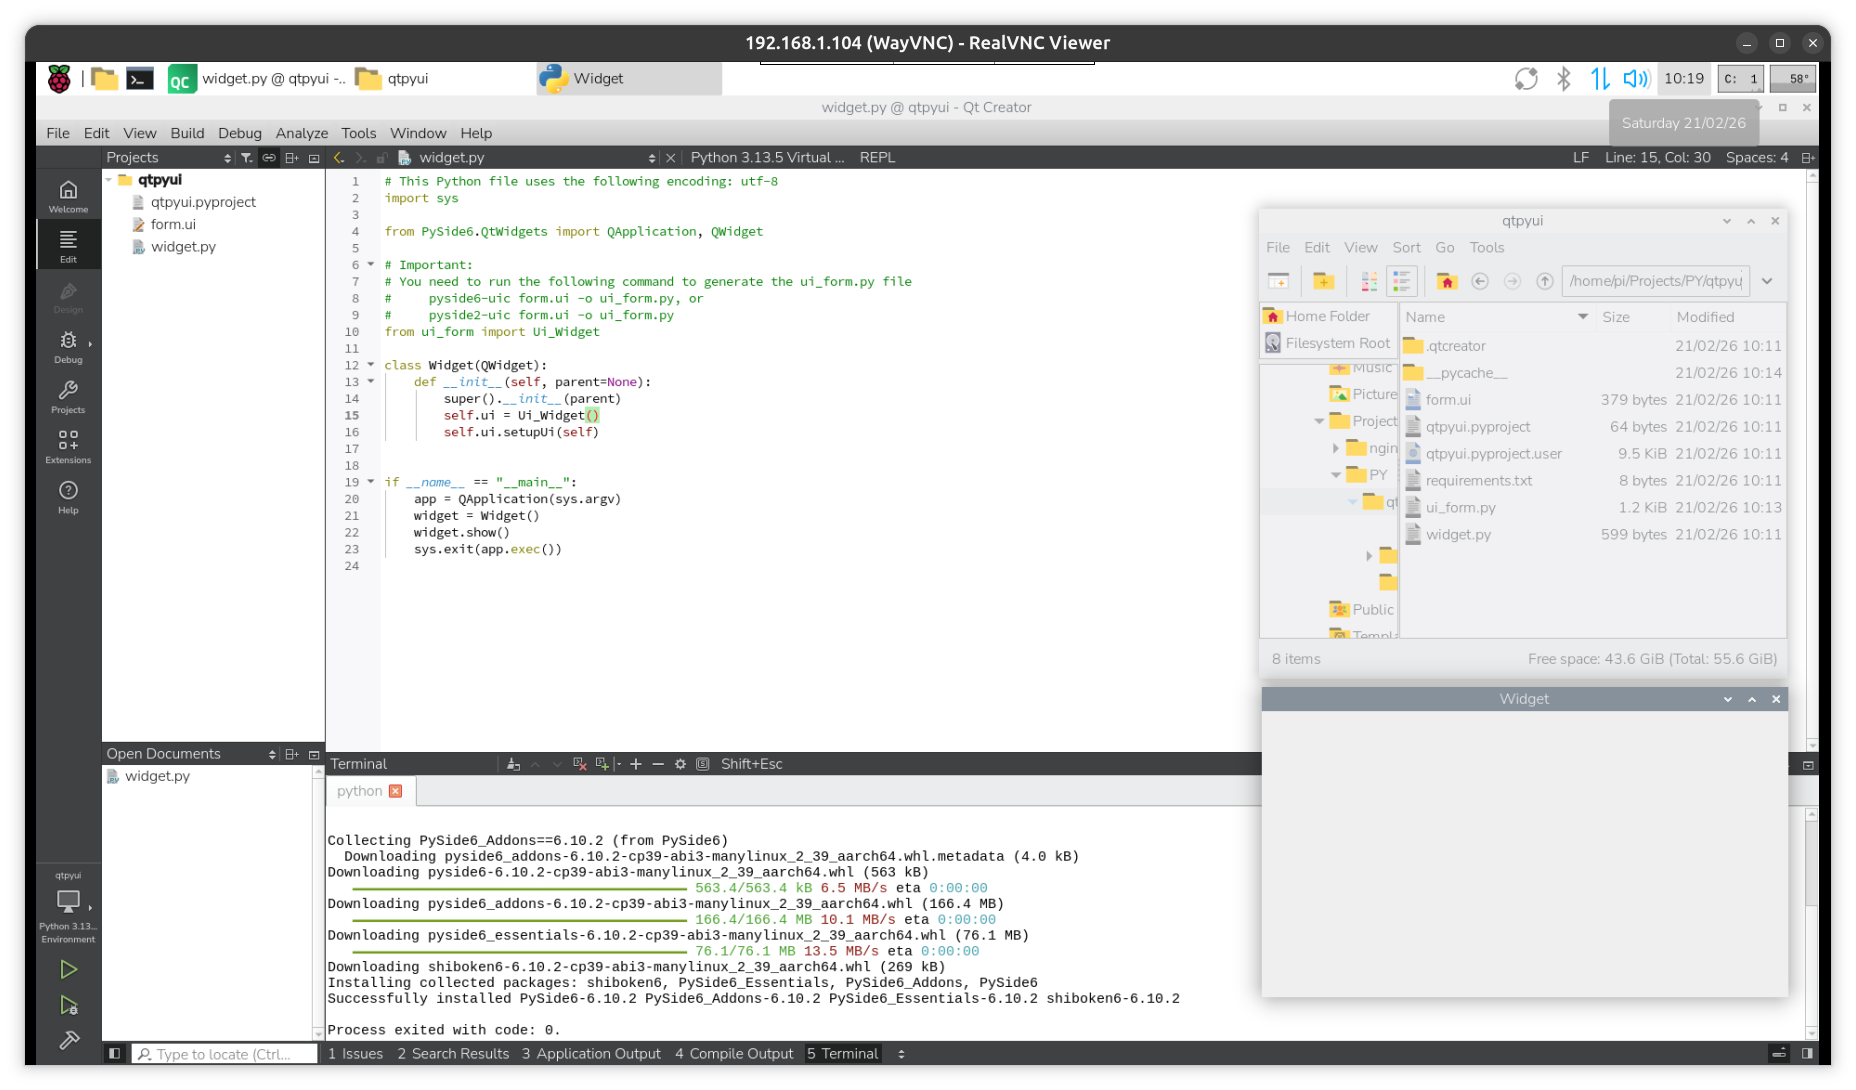
qtpyui/widget.py
there is a warning that
PySide6 install is missing ??? ok install there ?inside venv?
press [install] OK
double click form.ui open Designer ...
[ctrl][b] for BUILD ( that makes ui_form.py from form.ui )
[ctrl][r] for RUN
have to try from a new setup ( by SD Card Copy tool from 'master' ) what is needed if want only
QT6 PYTHON
see also pyside6-first-steps-qt-designer
sudo apt install qtcreator
sudo reboot
[menu] [Programming] [QT Creator]
[Create Project] [Application (Qt for Python)] [Window UI] [Choose]
Location: 'qtpyui' /home/pi/Projects/PY [default yes] [Next]
[Next][Next][Next][Finish]
there is a warning that
PySide6 install is missing ? install inside venv [INSTALL] OK
[ctrl][b]
[ctrl][r]
+ + so it makes its own VENV
+ + build creates window ui_form.py from form.ui
for add content to the GUI window double click on form.ui to start the Qt Designer
Example App
when you search for examples most end up with PyQt ( 5 or 6 )
so search must include PySide6
while on the widget side should be not much differences, the correct lib calls matter.
found pyside6-tutorial
try there note
mkdir note
cd note
python -m venv venv
source venv/bin/activate
now in (venv)$
pip install pyside6
nano note.py
( get from tutorial )
python notes.py
ok, while that works,
it is not what i wanted to try
deactivate ( or close terminal window )
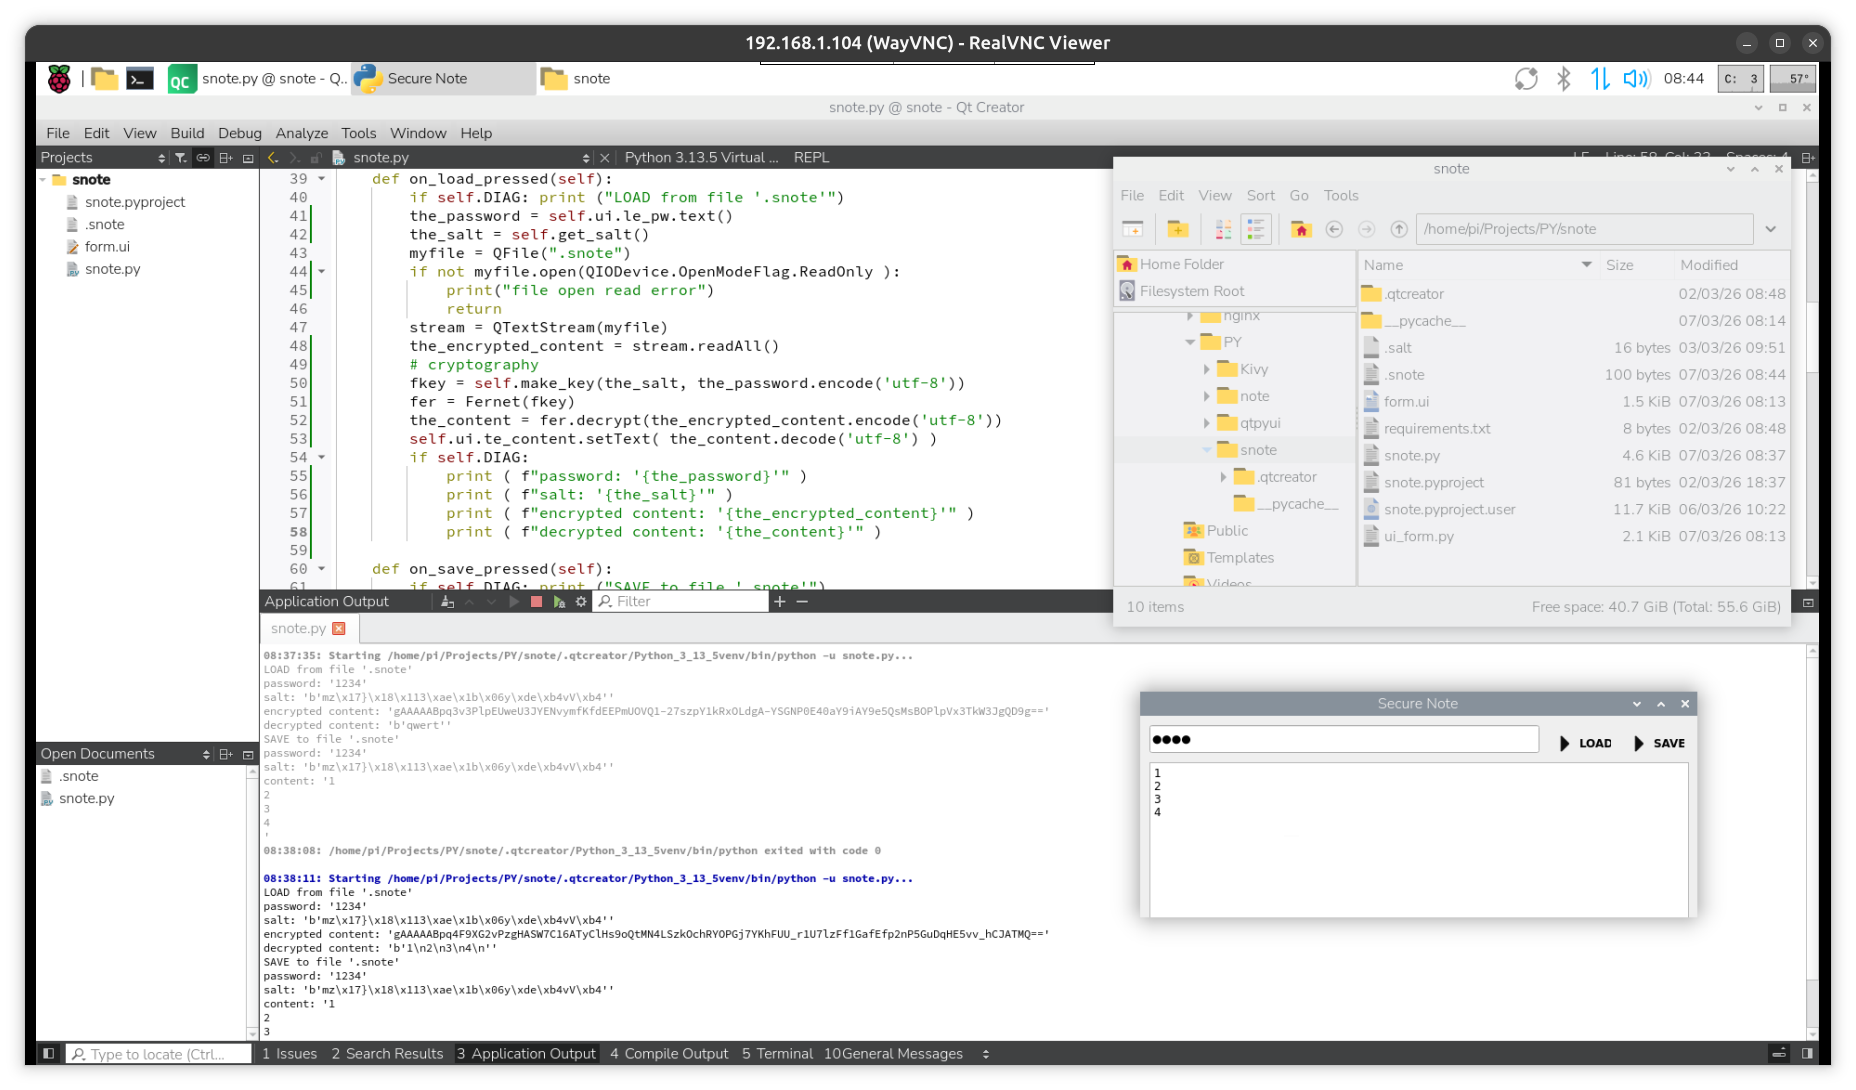
so again make in QT Creator a project using [Window UI] 'snote'
add in QT Designer a line edit widget for password input
and name it le_pw
and make it echoMode "password"
now in the widget class of 'snote.py' add:
 self.ui.le_pw.returnPressed.connect(self.on_pw_Input)

 def on_pw_Input(self): print ( f"pw: {self.ui.le_pw.text()}" )
and see the typed password in the terminal window after [ENTER]
that was only a test aka
'HOW TO code a widget'
that 'self' thing is a Python class ugliness
now add a LOAD and a SAVE button for operation
and a text edit window where you type / or see / your secret content
connect the buttons in the python code
and add a file IO to/from a local file '.snote'
with that working, now i tell you what this is about:
i want to encrypt some small information local ( offline )
into a file ( yes hidden as .snote is not much of a security )
in a terminal ( outside of qt creator ) need to goto venv first
source .qtcreator/Python_3_13_5venv/bin/activate
pip install cryptography
and get cryptography-46.0.5
( how to do this from inside of qt creator ? like in a venv terminal ? i not find out )
try to read examples i found like 3 functions:
-1- make a ( auto ) key and save to file
-2- read the key from that file and encrypt some source file and save to target file
-3- read the key from that file and decrypt the target file
now that is absolutely not what i want
when i searched for generate a key from a password it got very complicated, see here
so follow that path requires
* type a password
* read existing salt from .salt file / or make a new one ( possibly have to try again )
* use both to make a key
* start fernet with that key
* make en_ or de_cryption of the content file .snote ( now must be binary also )
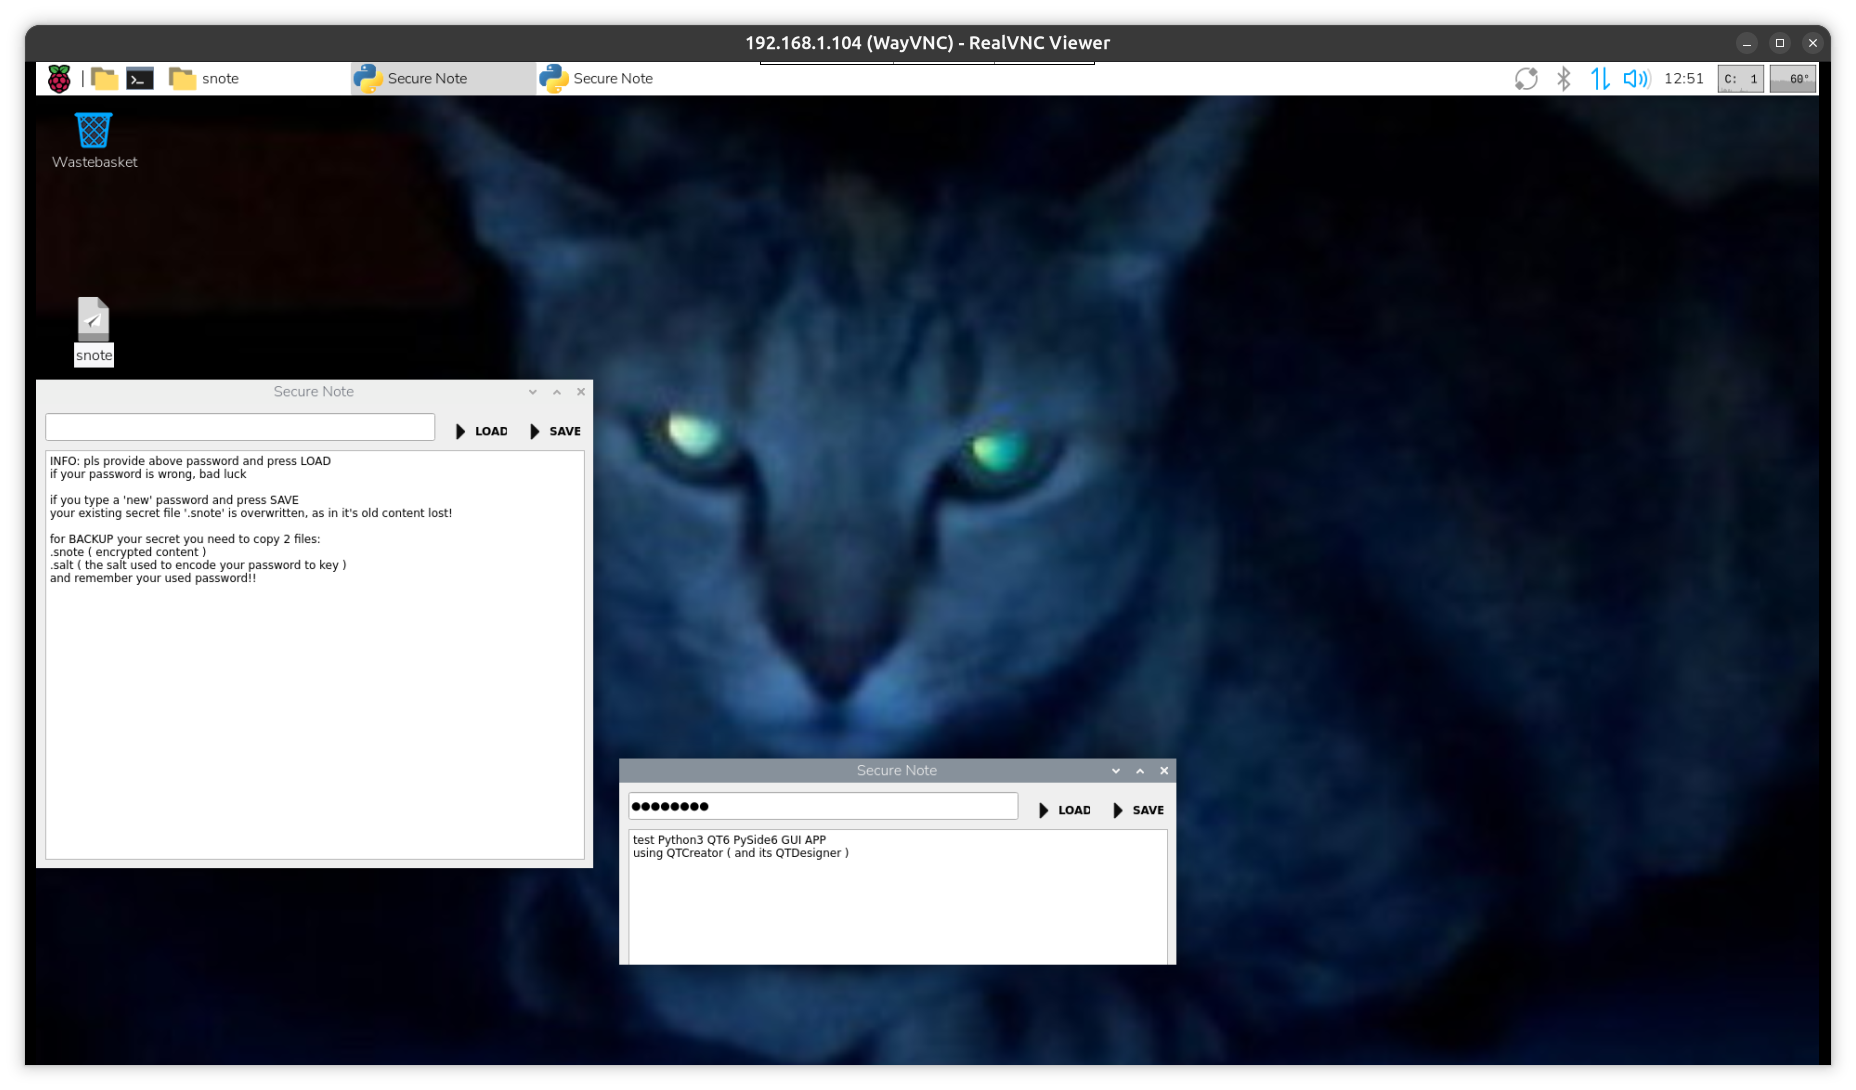
INFO: pls provide above password and press LOAD
if your password is wrong, bad luck
if you type a 'new' password and press SAVE
your existing secret file '.snote' is overwritten, as in it's old content lost!
for BACKUP your secret you need to copy 2 files:
.snote ( encrypted content )
.salt ( the salt used to encode your password to key )
and remember your used password!!
pls find source code for ( 2 modified files ):
snote.py
form.ui
code: 'snote.zip'
expecting that you created a QT creator project snote with
[Create Project] [Application (Qt for Python)] [Window UI] [Choose] ... 'snote'
installed the pyside6 on request
and did also install the
(Python_3_13_5venv) pi@rpi4:~/Projects/PY/snote $pip install cryptography
inside this projects venv
? possibly the 'requirements.txt' file must include that? manually add?
now to start a python app on a RPI must always use it with its venv
nano start
#!/bin/bash
cd /home/pi/Projects/PY/snote/
# start python from inside venv
/home/pi/Projects/PY/snote/.qtcreator/Python_3_13_5venv/bin/python3 /home/pi/Projects/PY/snote/snote.py
chmod +x start
no can try:
./start
for a graphical / desktop start make:
nano snote.desktop
[Desktop Entry]
Name=snote
Comment=Run My first Python Qt6 PYSide6 Desktop Application
Exec=/home/pi/Projects/PY/snote/start
Icon=/path/to/icon.png
Terminal=false
Type=Application
Categories=Utility;
and copy that also to your
/Desktop
so ypu can start from there ( with double click and confirm with [execute] )
i did find some icon locations on my RPI
so can try:
Icon=/usr/share/icons/PiXtrix/64x64/apps/accessories-text-editor.png
for this picture i start my 'snote' app 2 times ( what makes no sense... ) just to show
* the start / info state and
* the successful give 'password' & press [LOAD] state
now as that was python GUI app
here is no COMPILED version..
the next step, HOW to deploy / distribute a running version i not tested, but i see this:
To create a Python Qt GUI executable, you need to
use Python bindings for the Qt framework (such as PyQt6 or PySide6) and
then package the resulting application using a tool like PyInstaller or auto-py-to-exe.
This process gathers all dependencies and creates a standalone application
that can run without a Python installation on the user's machine.
Docker Dev Environment
now in a new setup
and using my updated slow ( 15MB/sec ) master USB2 stick
burned to a ORICO USB3 adapter with a WD Blue SN570 250GB SSD
and check read speed:
sudo hdparm -t --direct /dev/sda2 shows 232.38 MB/sec
i do all the Docker setup things from RPI Docker
* install docker
* install portainer
from here follow video tutorial
so first need to setup VS code again:
sudo apt install code
code .
[yes]trust all... under /home/pi/Projects/
Extensions 'Dev Containers' and 'Python' install
and in terminal ~/pi/Projects/PY/
git clone https://github.com/Microsoft/vscode-remote-try-python
this also contains the container spec in:
.devcontainer/devcontainer.json
and the command to use that and build a container with Python
and install FLEX ( see 'requirements.txt' )
is shown on Youtube screen only for half a second...
that is why i hate videos
> reopen in container
that runs on my RPI4 for 300 sec
creates a container ( not with a good name ) and i can find it via 'portainer' / and its running /
now as the dev container environment is activated, can run it
and it should show some text from ( /static/index.html ) by web-server 'Flask'
at http://localhost:9000 ( via browser from inside RPI only )

pls, that was my first try, and happy it worked,
but sure it is not what this BLOG is about: desktop app.
so have to search for other example... Docker GUI app
anyhow, Docker is a other way to setup a working environment
( compared to Python Venv )
and more easy to work with different Python versions and installing tools ( with pip )
without cluttering your system.